Become the hero of your family and learn an Easy Sourdough Bread Recipe with step-by-step instruction, a Shaping Video that shows you two ways to shape your dough, plus how to proof and bake it too! With over 20 step-by-step photos and photo grids plus the video, you can absolutely learn to how to make sourdough bread no matter your level of baking experience.
What is a sourdough culture?
A culture (aka a mother or starter) is created from a natural fermentation process from wild yeast and wild bacteria. Wild yeast and wild bacteria are present in our air, water, and flour.
When flour and water are combined and fed more flour and water regularly, the fermentation process can begin, resulting in an active live culture that can be used to ferment bread and make it rise. Another name for sourdough bread is naturally leavened bread.
How to use a sourdough starter for sourdough bread
Instead of using dry yeast from a packet, a sourdough culture/starter will create the most incredibly delicious and nutritious bread known to man.
If you already have a sourdough starter that you feed daily (or weekly if kept in the fridge), then you are likely familiar with the process of using a sourdough starter for bread baking.
However, if you don’t have a sourdough starter already, then it’s essential that you read my post for The Lazy Baker’s Guide to Caring For a Sourdough Starter.
This sourdough bread recipe uses about 1/2 cup or 94 grams of sourdough starter.
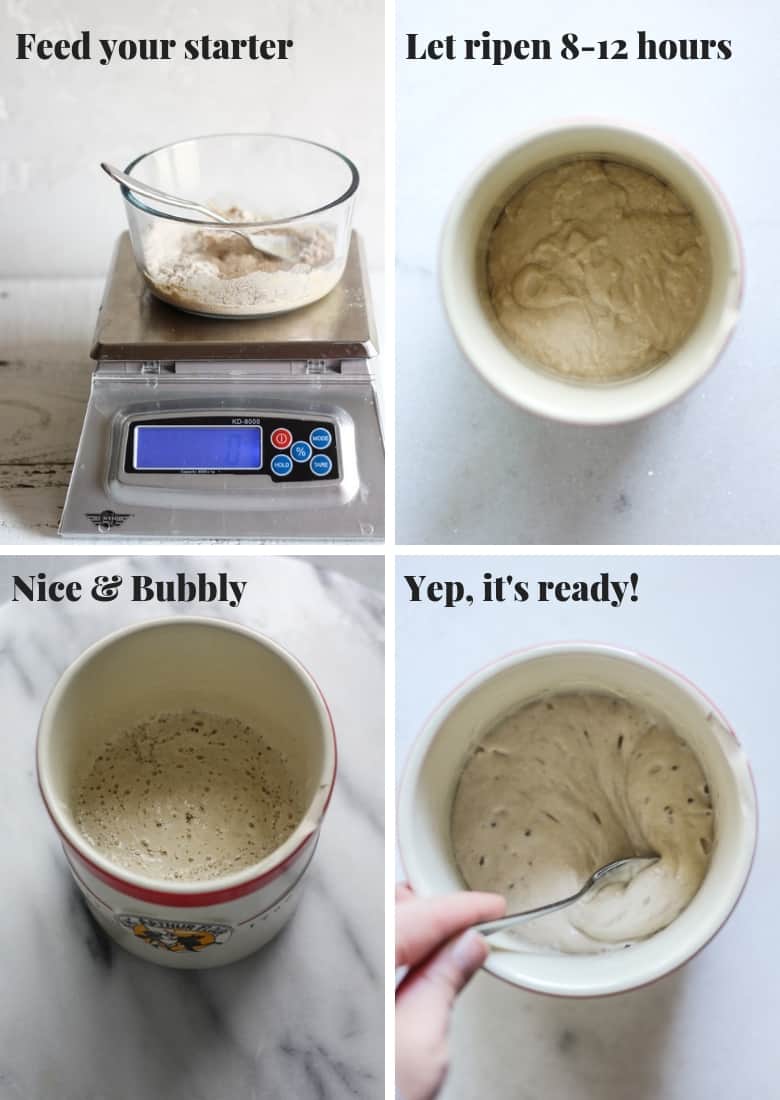
The grid below shows the simple steps.
- Feed your starter flour and water 8-12 hours before you are ready to mix this sourdough bread recipe.
- Let the starter ripen. In the 2nd photo, the starter isn’t bubbly because it had just been fed.
- In the 3rd and 4th photo, about 8-12 hours later, the starter is nice and bubbly which means it’s ripe and will make your bread rise properly. Scoop out 94 grams of the starter and add to your dough for mixing the sourdough bread.
Feeding your sourdough starter to keep it alive
- After you have scooped out what you need for the sourdough bread recipe, take out 20 grams of starter from the sourdough pot and feed it 50 grams of water and 50 grams of flour. Throw away any remaining starter (if any), rinse the sourdough crock/pot, and place the mixture you just fed back in the sourdough pot for the next day. See the Lazy Baker’s Guide for the easy way to take care of your starter.
Purchase an active sourdough starter
The easiest way to get your hands on a small portion of a sourdough starter is to purchase an established one from a reputable company. These are my favorites:
- King Arthur Flour sourdough starter
- King Arthur Flour starter and crock set
- Breadtopia Live Sourdough Starter on Amazon
Sourdough Bread Recipe ingredients
For the flours, I use a mixture of bread flour and all-purpose flour because these two flours are most readily available at grocery stores. Bread flour has a high percentage of protein which helps create a nice structure, but a bit of all-purpose flour (which has a slightly lower percentage of gluten proteins) helps to create a more tender crumb.
I recommend King Arthur Flour organic flours whenever possible.
- Bread flour
- All-purpose flour
- Water
- Salt
- Honey
- Sourdough Starter
Tools for Making Sourdough Bread
Contrary to popular belief, you don’t need a ton of fancy tools to make bread. Chances are, you probably have some of these items in your kitchen now. However, a digital kitchen scale is one that is a must! These are Amazon affiliate links.
- Digital Kitchen Scale –> Ditch the measuring spoons and cups and weigh your ingredients instead. This is FAR more accurate and much easier than scooping and leveling several cups of flour and water. Simply place your mixing bowl on a scale and pour each ingredient in the bowl until you get the right weight. Zero or “tare” the scale each time you add a new ingredient to ensure you get the correct weight.
- Metal Bench Scraper –> This tool comes in handy for scraping sticky dough off of your counter without having to heavily flour your work surface. It also assists in shaping your dough (see video for using a scraper when shaping)
- Cast iron skillet –> Proof and bake your sourdough bread in a cast iron skillet to help hold the shape and create a nice crust. A cast iron skillet can be used for cooking so many things and will outlast your grandchildren if you take care of it. You can also use a dutch oven instead of a cast iron skillet, but they are more expensive. Don’t go out and buy one unless you see yourself making lots of soups and stews over the years. I linked the Lodge dutch oven because they are awesome and more affordable than ones made in France.
- Bread Lame or thin serrated knife for “scoring” your dough before baking (see photos & video for instruction)
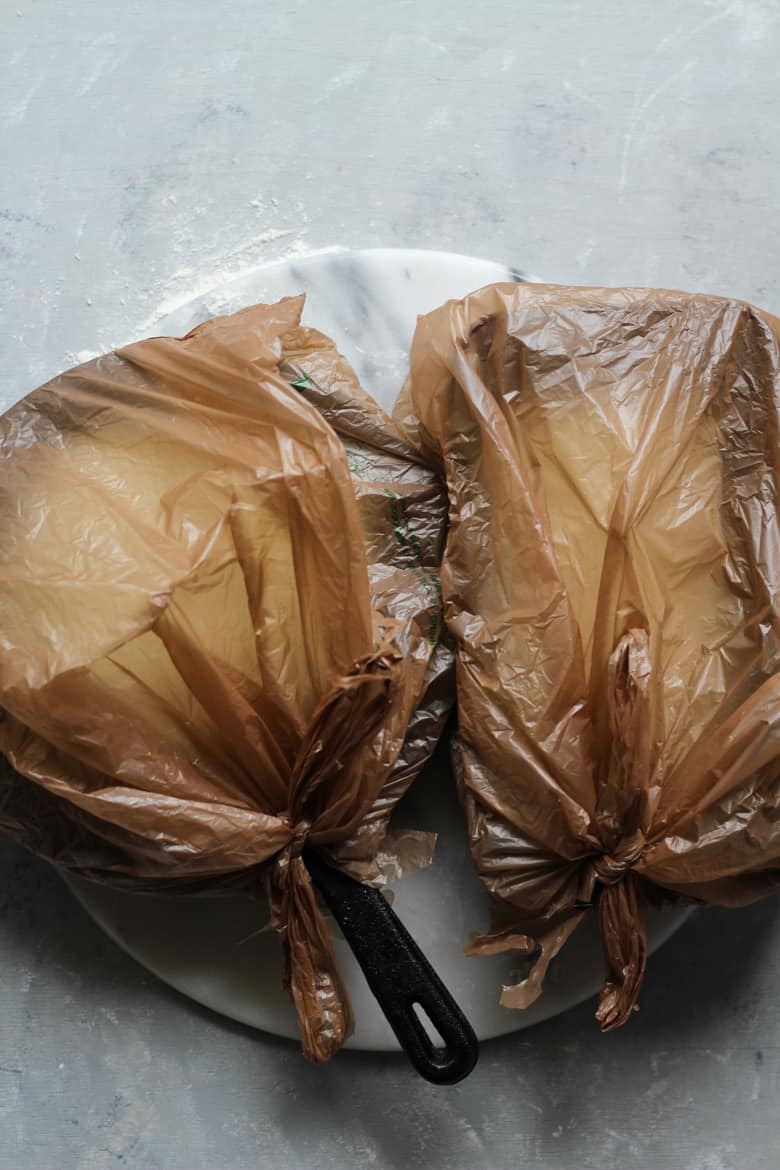
- Plastic bags for covering your loaf tins or cast iron skillet while proofing the dough (see photos below).
Mixing the sourdough bread recipe
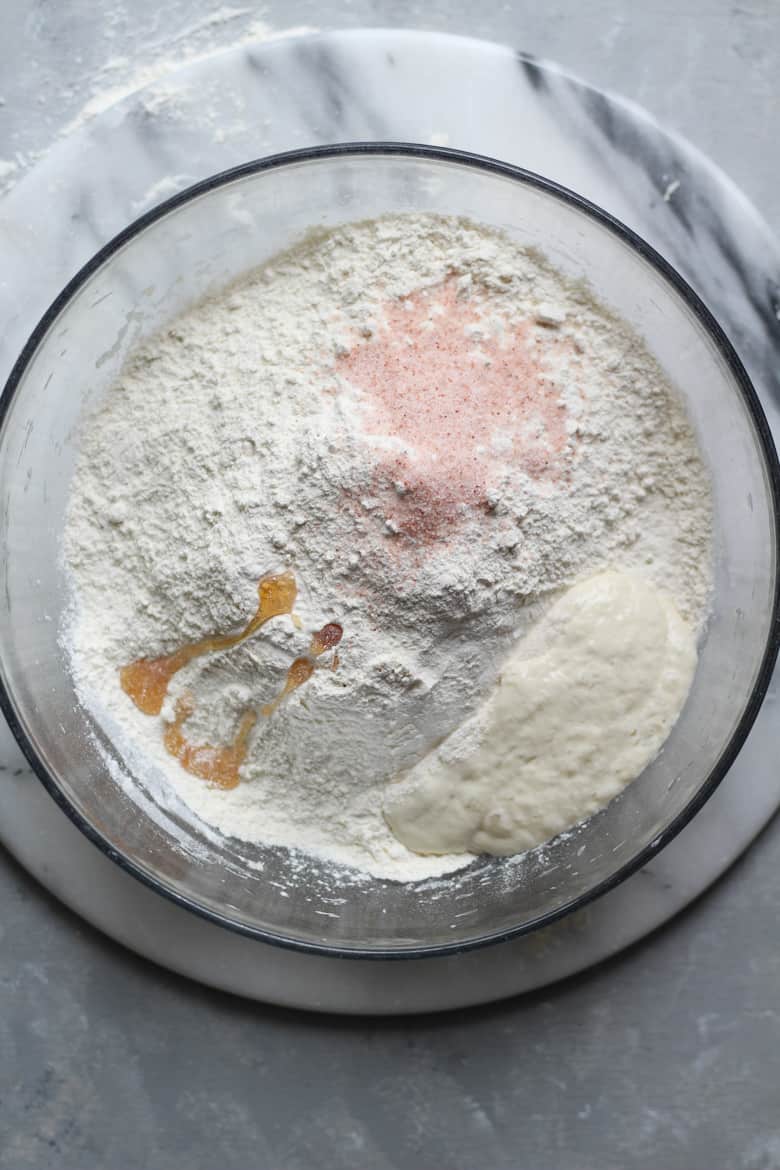
As you can see below, I have added the bread flour, all-purpose flour, sea salt (I used pink Himalayan sea salt because that’s what I had on hand).
Next add the sourdough starter, water, and honey and mix with a wooden spoon until combined.
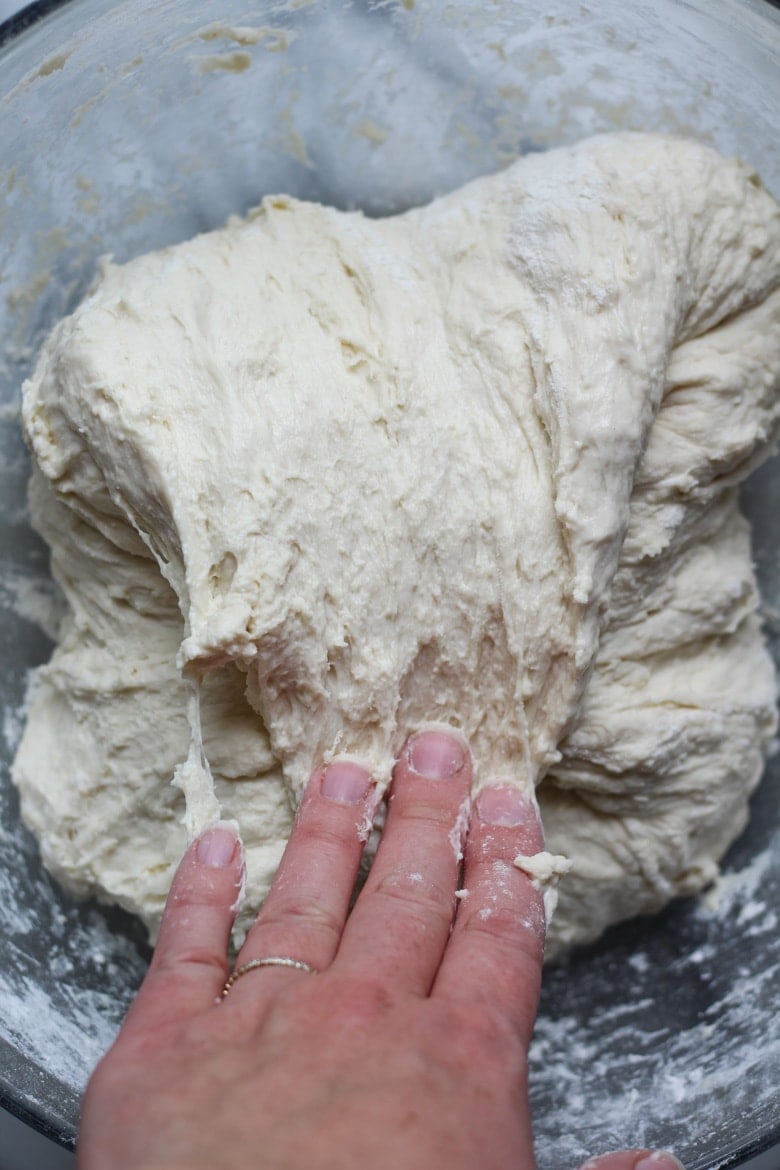
Pour the dough onto your counter and knead with your hands for a couple of minutes. Using a metal bench scraper to scrape the sticky dough off of the counter while kneading helps this process.
Folding the Dough
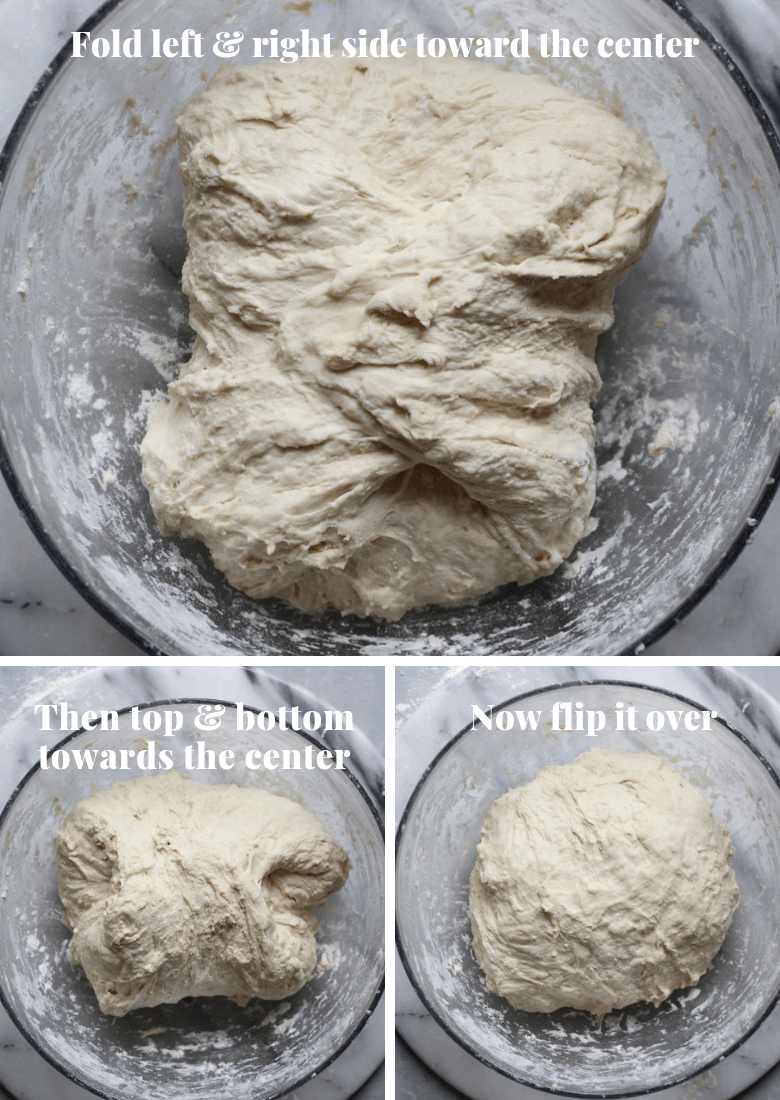
A “Fold” is an easy technique for helping to create a better structure for bread without having to knead the dough and develop the gluten too much.
It’s simple: After you have kneaded the dough for a couple of minutes, stretch the left side of the dough towards the center, then the right side towards the center. Then stretch the top and bottom of the dough toward the center. Flip the dough over, cover with plastic wrap and ferment.
Fermenting the Dough
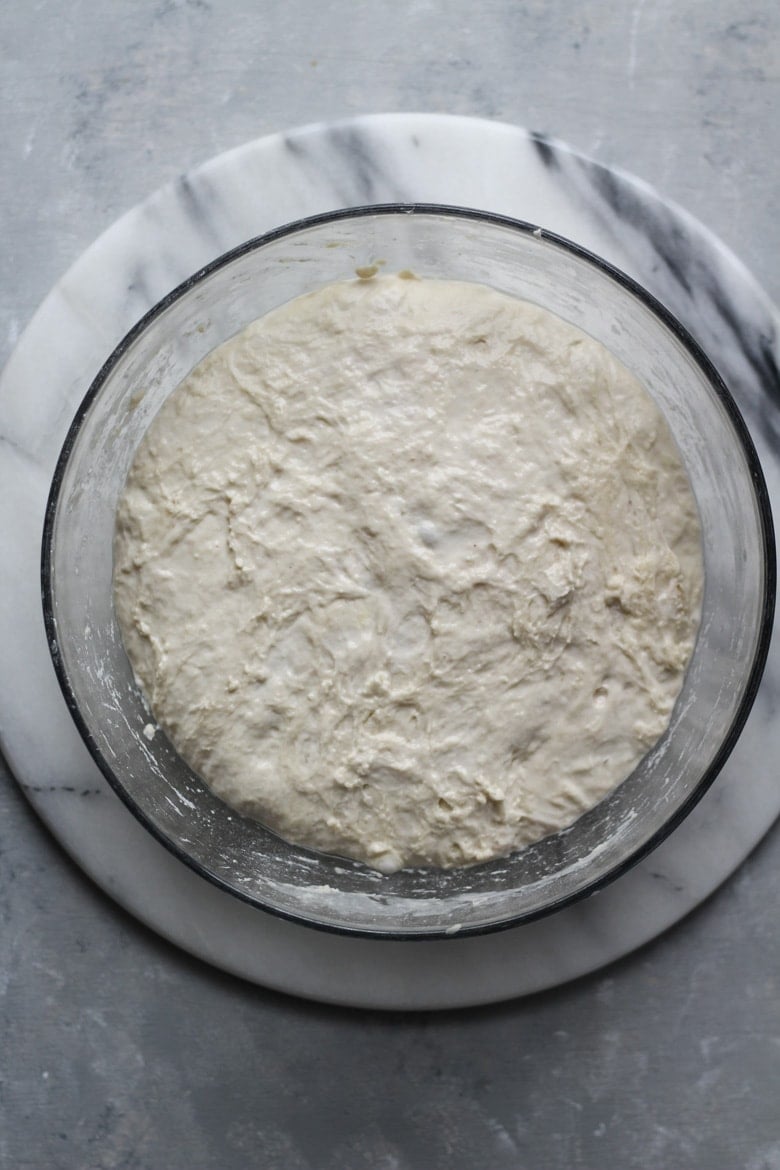
Ferment the dough for about 8-12 hours. Fermenting dough with a sourdough starter is a slower process than using dry yeast, therefore there is more flexibility when fermenting the dough.
You can start the dough at night, then shape, proof, and bake the dough the next morning. Or you can start the dough in the morning and finish it at night.
Pre-shaping sourdough bread dough
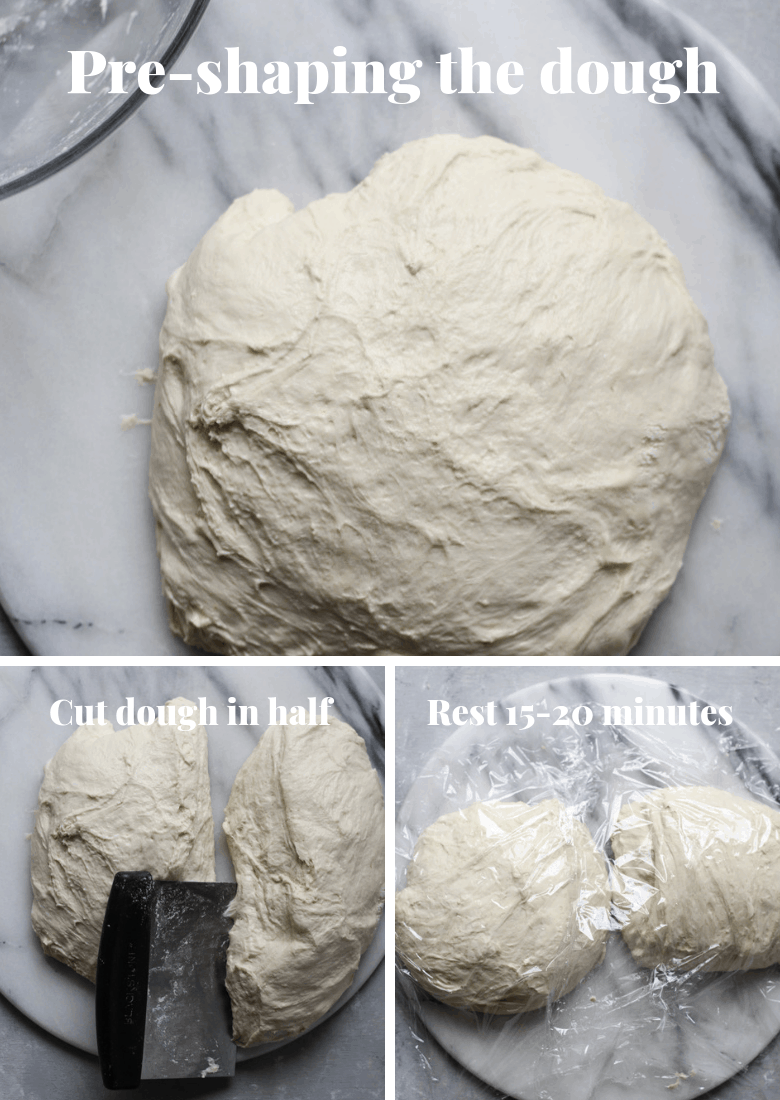
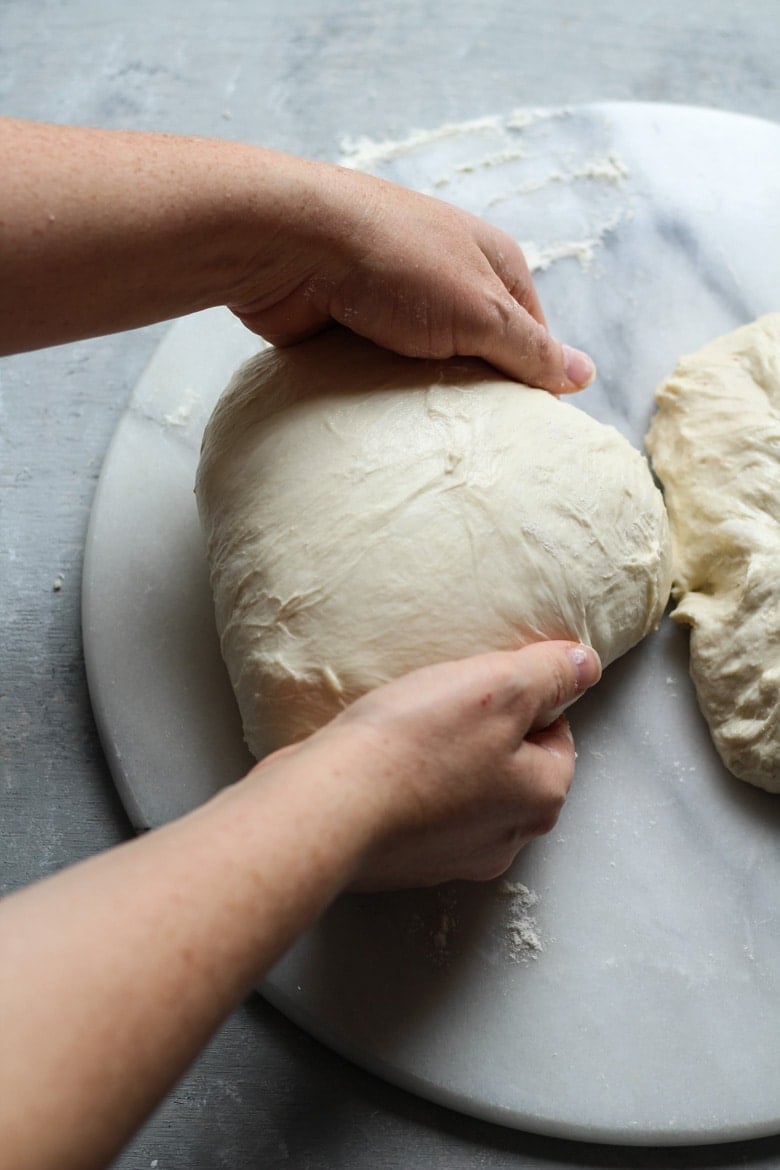
Pre-shaping is a simple method of loosely shaping the dough so that it’s easier to shape your dough. By pre-shaping, you won’t overwork the gluten and the dough will hold the final shape much easier.
You’ll pre-shape the dough and let it rest for 15-20 minutes to allow the gluten to relax before the final shaping.
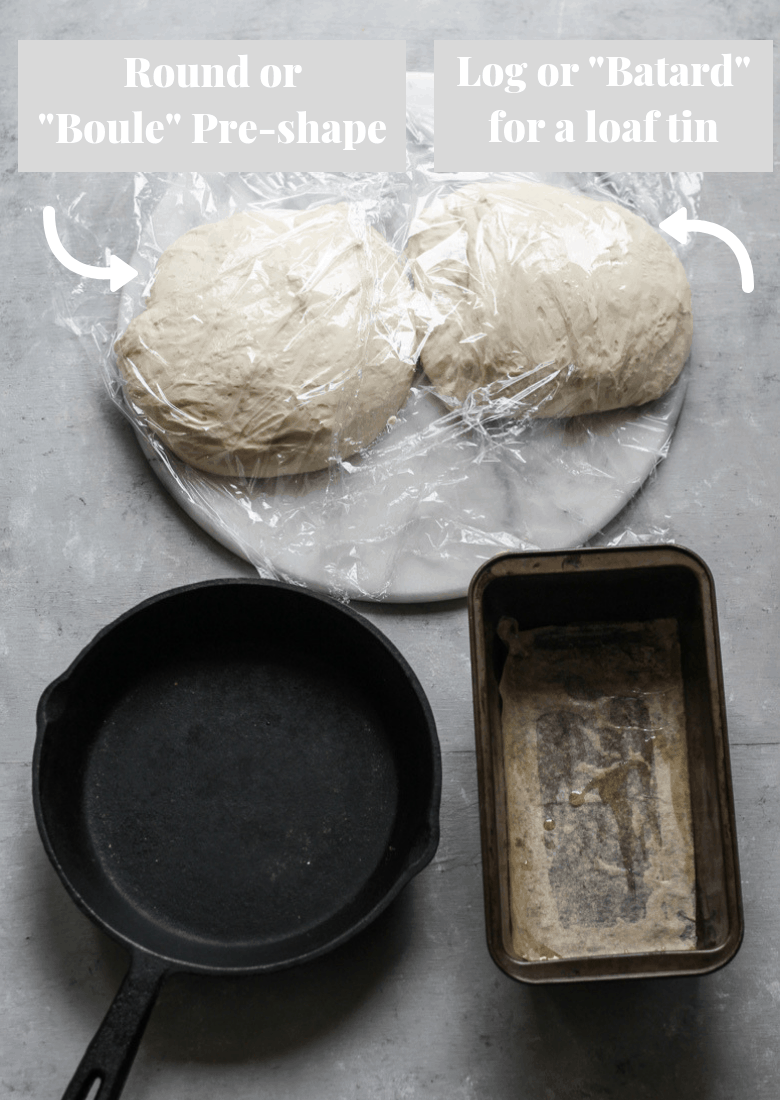
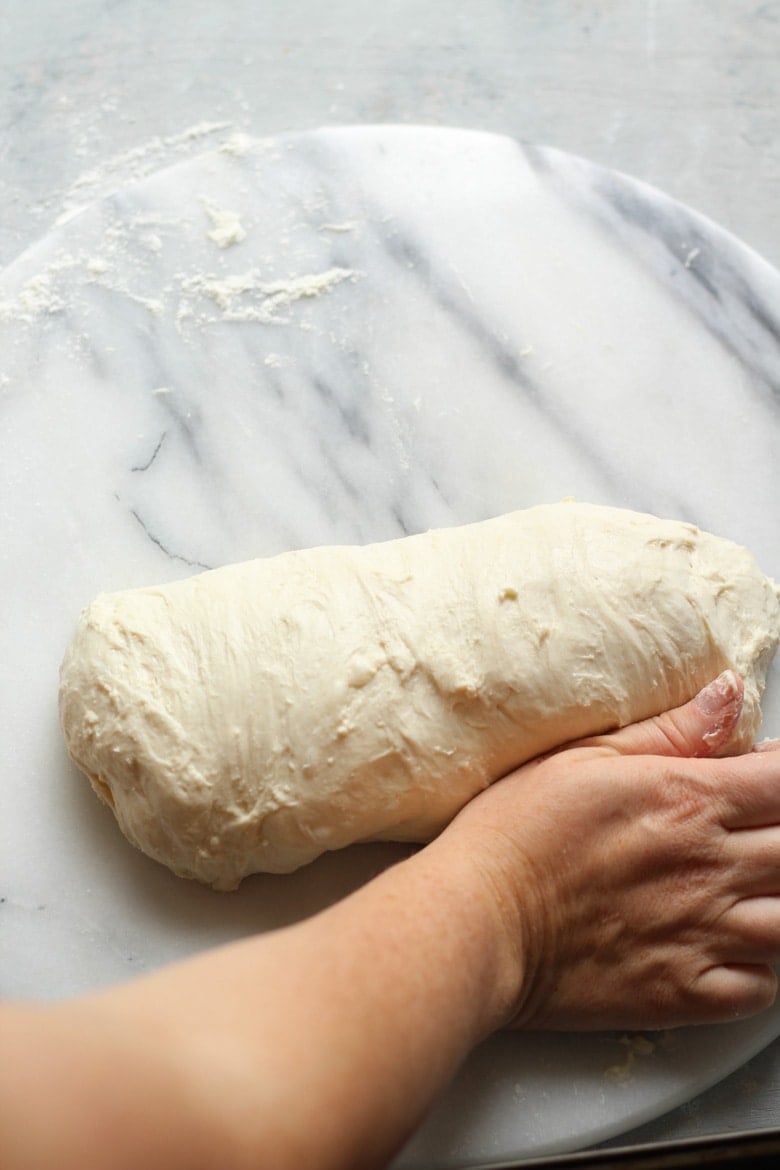
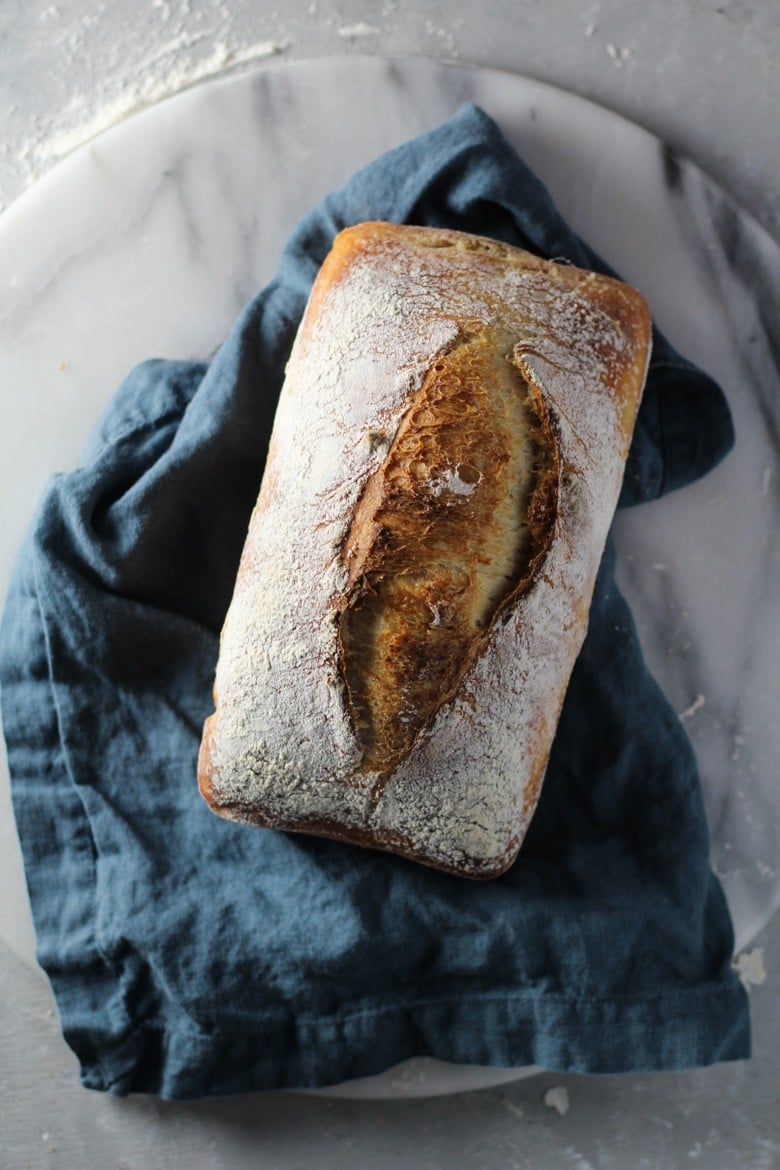
For this sourdough bread recipe, I took the dough and cut it in half. One half of the dough will be shaped into a round or “boule” shape for the cast iron skillet or dutch oven. The other half will be shaped into a log or “batard” shape for a loaf tin which is great for sandwich slices.
If you are experienced and want to shape this bread free-form (without a vessel)
You can shape both pieces into 2 logs or 2 rounds if you want, it’s up to you.
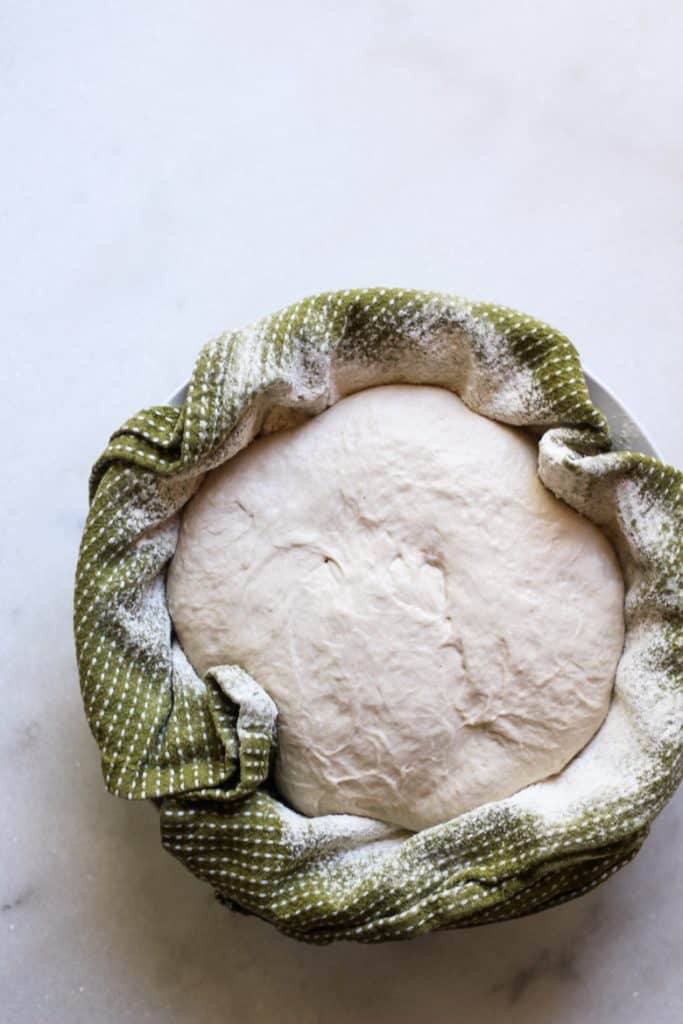
It’s just that once you shape them, you’ll need to proof them in the vessel. Alternatively, you can shape them and proof them in a salad bowl lined with a clean kitchen towel or linen couche. Once they are proofed, flip the dough over onto a piece of parchment paper and bake them free-form in your oven on a clay stone.
Example:
Watch the video for visual instruction.
Shaping the dough
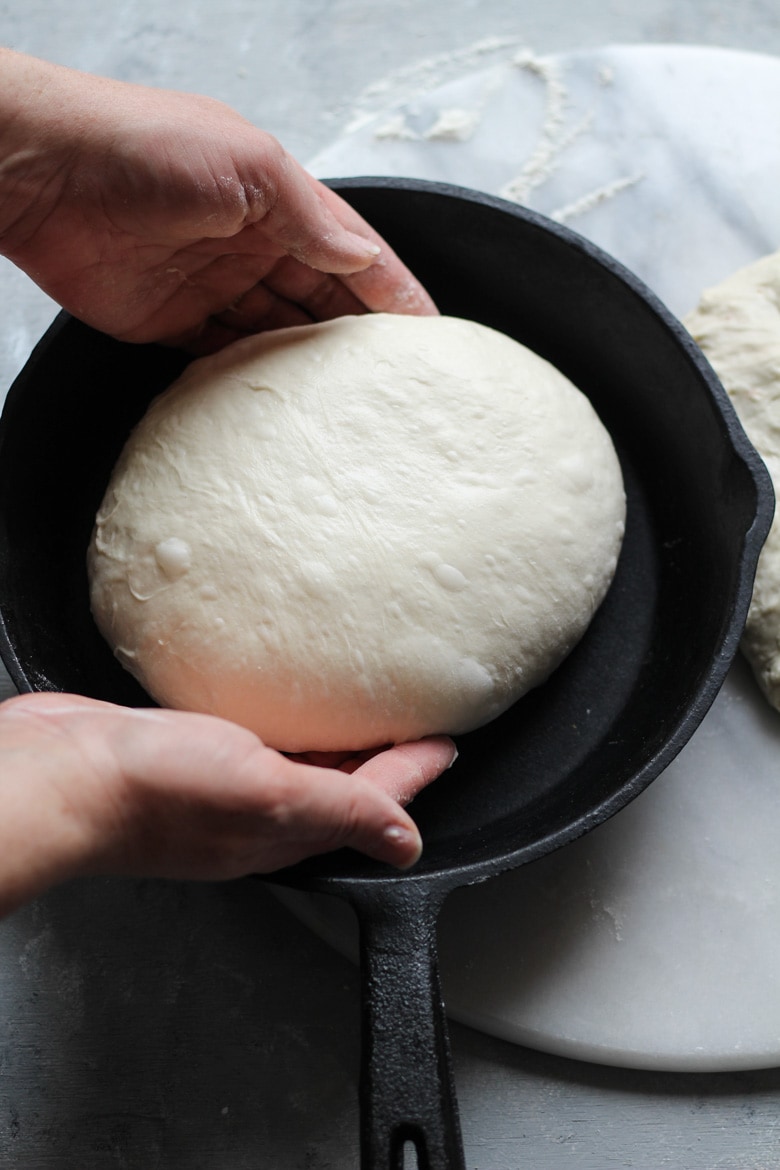
Now we shape our two loaves so that they can be proofed. Watch the video below for visual instruction on shaping!
Proofing the loaves
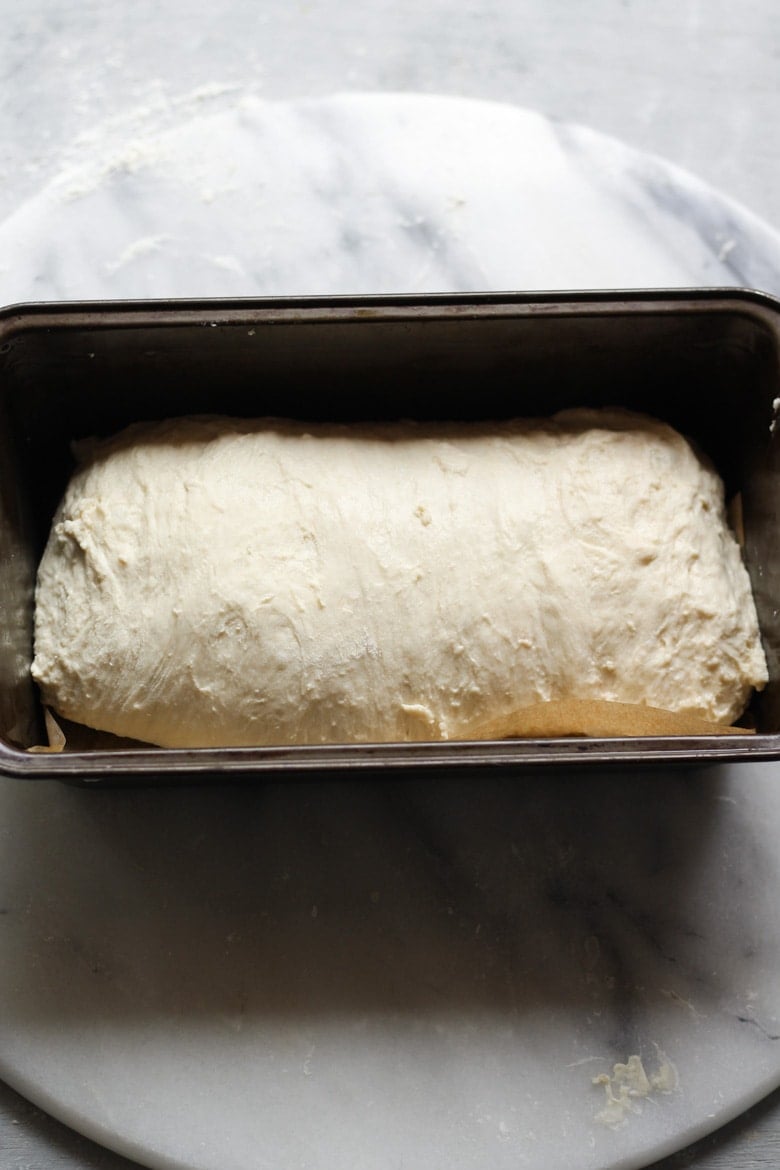
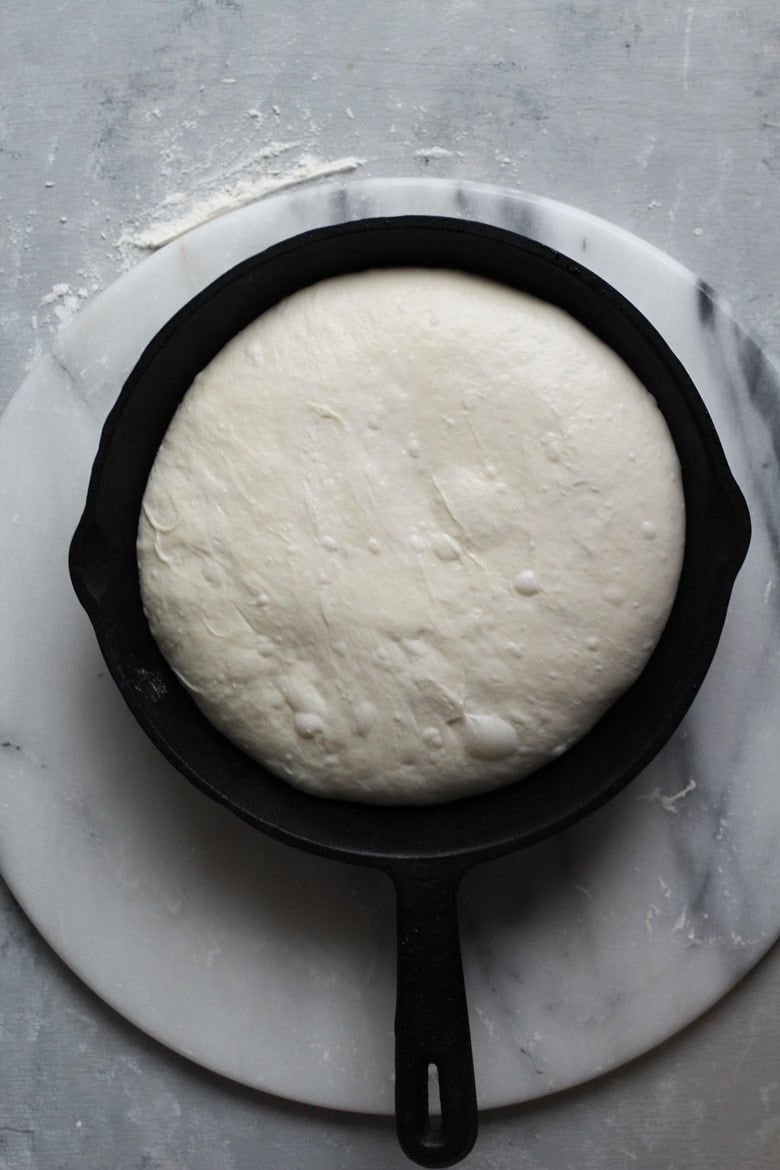
You’ll proof the round loaf in a cast iron skillet and the log shape in a loaf tin. Cover the pans with plastic bags and tie up so that no air can get in. This keeps you from having to use tons of plastic wrap.
Again, if you are experienced with shaping, you can proof the dough in a bowl lined with a linen towel or couche, so that it can be baked without a vessel.
Scoring and Baking the sourdough bread
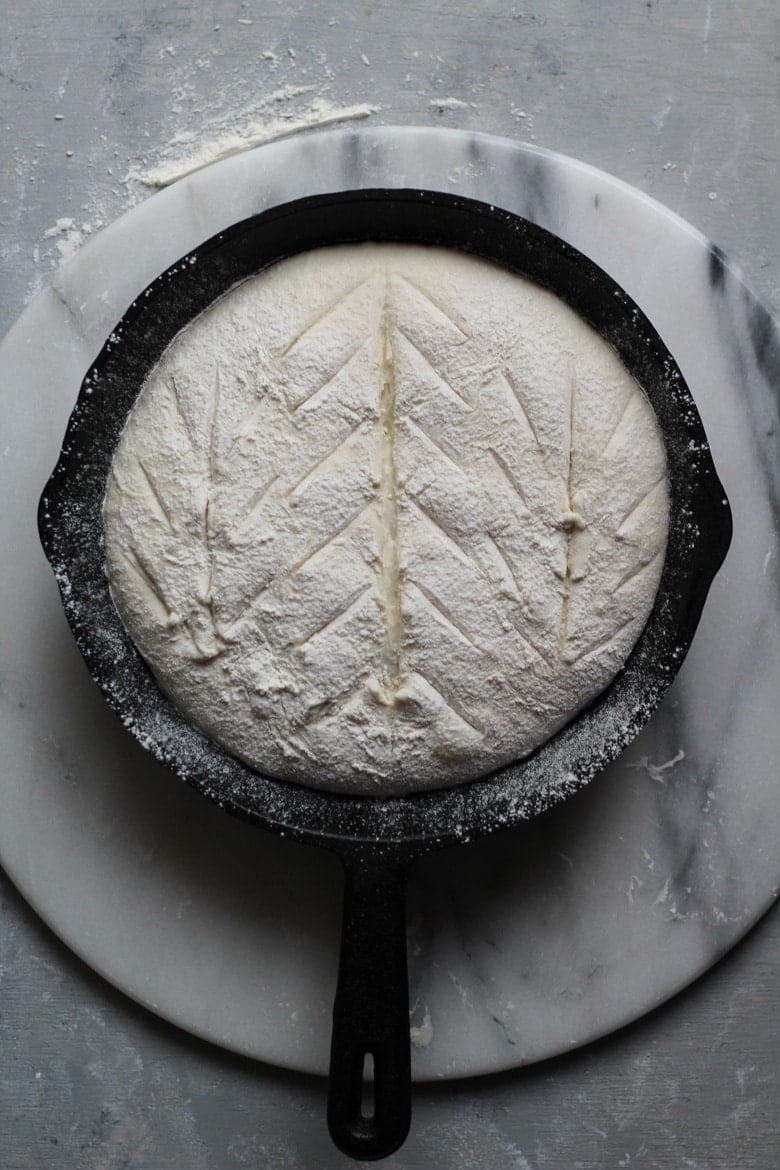
Preheat your oven to 450 degrees. Remove the plastic bags from the pans and sift flour over the tops of both loaves.
With a bread lame or thin serrated knife, score the tops of the loaves to allow for the bread to expand and bloom in the oven and give a nice decorative look.
Watch the video below.
Watch the video & learn how to shape, proof, & bake this sourdough bread! ⇓
Click here to Pin this post on Pinterest

Believe me, I know making bread seems like a process, but I PROMISE you, it’s worth it. I know you can do it.
You will feel so proud when you pull these loaves out of the oven. Please comment below if you have any questions or want to share your experience with me. I’d love to hear about it!
Bon Appetit Ya’ll,
Leslie O.
EASY SOURDOUGH BREAD RECIPE & SHAPING VIDEO, SHAPED 2 WAYS
Ingredients
- 880 grams Bread flour (Use a digital scale for this recipe and ditch the measuring spoons and cups)
- 120 grams All-purpose flour
- 20 grams Salt
- 700 grams Water room temp
- 94 grams Sourdough Starter about 1/2 cup
- 4 grams Honey
Instructions
Mixing the Dough
- Mix the flours and salt together in an extra large bowl.
- Add the water, honey, and sourdough starter and stir with a wooden spoon until it comes together. Start to knead it by hand until all of the ingredients form a sticky ball. It will be a mess so dump the dough onto your kitchen counter to finish kneading. A metal bench scraper comes in very handy for helping to lift the dough from the surface while kneading.
- Knead for about 1-2 minutes until the dough is formed. You don't need to worry about developing the gluten, as the long fermentation will do that on its own.
- Give the dough a fold by stretching the left and right side of the dough towards the center, then stretch the top and bottom of the dough towards the center. This will help strengthen the dough. Flip the dough over in the bowl and cover with plastic wrap.
Fermenting the Dough
- Let the dough ferment for about 8-12 hours. This time is flexible as sourdough bread takes longer to ferment, therefore there is a larger window that you can let the dough ferment in.
Shaping the Dough
- Take the dough out of the bowl and dump onto the counter. Don't add flour to the counter to make it easier to shape.
- Scrape the dough from the bowl and for two large loaves, cut the dough in half. Shape into rounds or loaf style. Watch the two-minute shaping video in this post for instructions. You can make whatever sizes you want, but two loaves work great.
- Place the round or "boule" shape in a 9-inch to 12-inch wide cast iron skillet (sizes vary), or you can line a dutch oven lined with parchment paper and place the round in there. For the loaf shape, place in a loaf tin lined with parchment paper and a little oil. Put the skillet or loaf tin inside a plastic bag and tie it so that there are no air holes as long as it fits inside the bag. Watch the shaping video for visual instruction.(If you are more experienced with shaping dough, you can bake it without a vessel.)
- Ferment the dough for about 90 minutes to 2 hours, or until it's doubled in size.
Baking the Dough
- Preheat oven to 450 degrees before the dough is done proofing. Sift bread flour or all-purpose flour over the top of the dough to make it easier to score the dough.
- Bake for about 40 minutes, or until it's golden brown and hollow when you tap the bottom the bread. If it sounds hollow, it's done, if it sounds dense, it needs a few more minutes. You can put it back in the oven directly on the rack (without a baking vessel). Again, watch the video for instruction.
- Let rest for at least 30 minutes before cutting for ease of slicing.
- Once cut open, cool completely and cover in plastic wrap. It will keep for about a week on the counter or you can freeze it for much longer.
- With a thin, small serrated knife or bread lame, "score" the top of the dough with a pattern or a line in the center from one side of the top of the dough to the other. See video for visual instruction.



Video not linked.
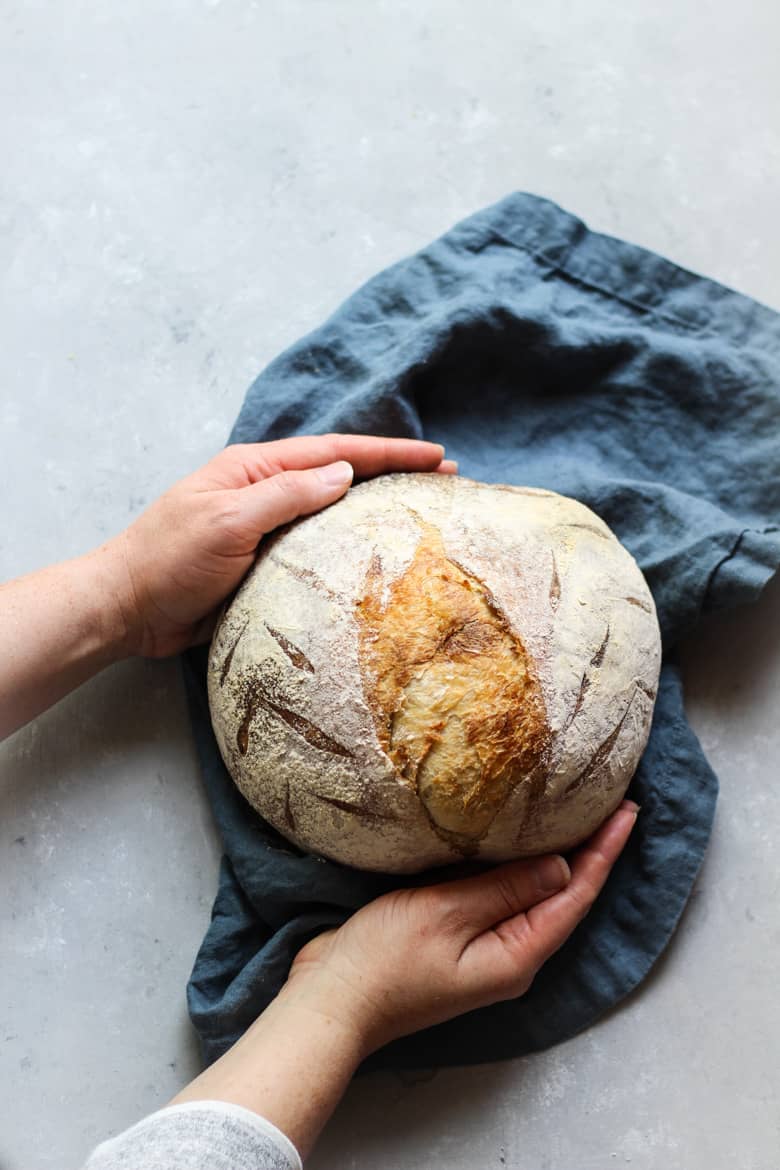
Hi Ruby! The video is within the blog post above the photo of me holding the sourdough bread. However I just now uploaded the video inside the recipe card to make it easier to find and follow along while making the recipe. Let me know how the recipe turns out if you make it. Thanks and have a great day!
Hi there! None of the links work for the video. I really would love to see the process..
Robyn
Hi Robyn! I just checked and the shaping video that’s embedded within the blog post and also within the recipe card seem to be playing for me. Are they playing for you?
Looking forward to trying this recipe! A bummer though you don’t have translations for those who don’t have a digital scale. I understand it’s more accurate/easier, but I just don’t have one. I’ll see if I can utilize other online resources to figure out the measuring cups/spoon equivalencies to your recipe. We’ll see how this turns out!
I totally understand! I posted this recipe a while ago (when the idea of flour shortages was like something out a movie) so that’s why it hasn’t been updated. I can only find one bag of flour every 1-3 weeks so I’ve been unable to measure them with cups to make this recipe even more accessible. I’ve been slowly working on my different sourdough posts as I’m able to find flour. Please let me know if you have any other questions! Be safe.
I just made these. Loved the clarity of the instructions but I just took them out of the oven and they’re both stuck to their pans. 😩 I hope they let go once they cool a bit! If not, I’ll try again and maybe change the method of the ending and put them into preheated pans on parchment. Thank you for the beautiful recipe!
Oh shoot! I just found a quick article for you to create condensation on the bottom of the pans to help the loaves come out. Hopefully that works!
https://oureverydaylife.com/easiest-way-to-remove-a-stuck-bread-loaf-from-a-bread-machine-13408667.html
Can I make one large boule rather then divide the dough into 2 breads?
I’m a new baker but I like to experiment. I mixed in some about 1/4 oat flour in with the AP flour. My dough is very loose and sticky. Is that how it’s supposed to be?
And is it ok if I prefer to do the final kneading and shaping using some flour?
For this recipe I would recommend making two because one boule will be so large that you’ll likely need to freeze half of it anyway since it won’t stay as fresh. Also this is a sticky dough because it’s a high hydration dough which really helps the flavor and texture. Because this is a no-knead sourdough recipe the gluten structure is a bit looser so you’ll need to bake it in some sort of vessel (cast iron skillet or dutch oven). One large boule would be a bit trickier to maintain its shape during baking.
Oat flour is awesome but it doesn’t have gluten so the dough will be even looser, so you will definitely need a baking vessel and you’ll want to bake two loaves so they are smaller. Hope your bake goes well!
My dough isn’t very wet or sticky like most other sourdough recipes I’ve used so I’m a little concerned about how it will turn out.
Hmmm I’m not sure why it isn’t wet or sticky. The recipe does yield a sticky dough, so it just could be that the flour you used is absorbing a little extra water, making it less sticky. You can see in the video I have attached to the recipe card that the dough is sticky. I’m sure it will be fine though. Let me know how it turns out.
Just did the recipe and both bread are stick to the pan ! Do you put something at the bottom of your pan like oil or flour ? I put parchment paper for the loaf size bread and for the round one I put it directly in a glass bol.
Oh I’m so sorry to hear that! You can try the technique used on this post to see if it comes outs of the pans. Creating condensation should help it come out:
https://oureverydaylife.com/easiest-way-to-remove-a-stuck-bread-loaf-from-a-bread-machine-13408667.html
I do put parchment in the bottom of the loaf pan and sometimes I will in a cast iron skillet. I find oil or flour works great in a cast iron skillet and it doesn’t stick. But it might be better to add instructions to use parchment with oil on to just to be sure.
Here are some “cheapo” suggestions for those who want to keep costs down. I use plastic shower caps from the Dollar store to cover my bowl when I proof my dough. They come in a pack of 6 so when they get nasty, I just toss ’em. I also found a 6″ metal cutter/scraper with a rolled handle at the Dollar store that makes dividing dough and cleaning my counter easier. No one wants gloppy dough caught in their sponge or dish rag. Not bad for a buck!
I have an old, large ceramic bowl whose glaze is cracked so I can no longer use it for serving food. Instead, I use it to proof/ferment my dough in initially (covered with a shower cap, of course!). Because I live at 6000 feet, I have to do a second proof and have found it’s works really well to do this overnight in the fridge. A cool proving helps give it a more sour taste BTW. For this second proof, I line a bread basket (round or oblong work equally well) with a well-floured cotton tea towel (using the shower cap again). No need to buy an expensive Banneton! The towel makes it easy to turn the dough onto a piece of parchment paper for the final shaping which I then slide onto my pre-heated pizza stone for baking. I turn that (now washed) ceramic bowl upside down to act as a “steam chamber” for the first 15 minutes of baking, giving the bread a nice, chewy crust.
Hopefully these ideas can help others.
I LOVE THIS!! I can’t find bannetons anywhere so I still use salad bowls. I also bought some shower caps too for covering the dough. Tea towels are so much softer and release from the dough much easier, love that. Great idea as well using the ceramic bowl as a steam chamber too!! Thanks for sharing, have a great day.
I love bread and baking bread. I’ve been doing the long rise sourdough for a few months but don’t like sourdough. And while I could probably adjust, my husband hates it. I’ve tried adding baking soda just before baking as I’ve seen in several recipes but mine didn’t get well incorporated and I was always taught not to be kneading after its proofed and/or shaped. So, do have any suggestions for a less sour dough that does not have commercial yeast added to shorten the proofing?
The great thing about sourdough bread is that it doesn’t have to have a sour flavor. I think that’s the flavor that most people attribute to sourdough but there are many ways to make naturally-leavened bread. If you are looking to shorten the fermentation time with a less sour flavor you can reduce the starter amount by a little, but instead of fermenting the entire dough for a long period of time, you can make a “levain” which is a portion of the dough that has the starter added with about 20% of the total flour and 20% of the water (give or take) added to the starter and let that ferment for about 10-12 hours. This first fermentation with a small portion of the dough will activate everything, but then you can add the rest of the flour, water, salt together with the levain and ferment for a few hours (4-6 hours give or take). You would probably need to do some folds during this time too help with the structure.
Once you want to shape and proof it, you would want to proof in the oven with the light turned on (but the oven turned OFF with a note on the panel so as not to turn the oven on) so it will take less time to proof, maybe 60-90 minutes. Then bake. Obviously this is a very loose recipe and it requires some testing and tweaking but this could be a style of loaf that you and your husband may prefer. There a so many ways to use the same ingredients to make endless bread recipes!
This seems complicated at first, but it is so worth it! My husband and parents said it was the best bread they have EVER eaten! I’m on my third round of sourdough and it’s getting easier each time.
Oh wow Kathy, thank you so much for sharing! Sourdough can be tricky but it sounds like you are the champion bread baker of your family now. Your feedback means a lot!
What can I use instead of bread flour? I cannot find that anywhere!
If you can find unbleached all purpose flour I would use that, but I’d also recommend adding some whole wheat flour since whole grain flours have a higher protein content. This will help with the overall structure of the bread. Bread flour has a higher protein content than all purpose so the whole wheat flour can take the place of it. You might need to add a bit more water if you use whole wheat flour, but only add a small amount at a time until you’ve reached a nice sticky consistency.
Since the recipe calls for 1000 grams total flour, I would try using 700 grams of all purpose flour and 300 grams of whole wheat flour to ensure a strong gluten structure. Hope this helps and let me know how it turns out!
Can you do the final rise in the fridge overnight? I’d love to wake up and just bake this bread.
Yes you can do the final rise in the fridge overnight for 12 hours or so, but if your fridge is colder than 36-37 degrees Fahrenheit it might need to finish proofing it at room temp when you wake up in the morning since the fridge really slows down fermentation.
Thanks so much for your clear directions and videos! I love to bake desserts of all kinds but never attempted bread before. Now I’m baking sourdough loaves frequently.
Can you recommend how to best store a fresh loaf after it has cooled? Should it be wrapped in plastic wrap, foil, or a towel to keep it fresh? Some of mine got moldy after 4-5 days.
Hello Nancy, great question! I would wrap it in plastic wrap or a large reusable beeswax wrap if you have one for 1-2 days at room temperature. If you don’t think you’ll eat the entire loaf in 1-2 days, I would cut it in half, and wrap both sides up and place on side in the freezer. For the one in the freezer I would wrap that one in plastic wrap. Thaw the other half when you are ready to enjoy it. It will stay nice and fresh when you freeze it.
I assume I can halve the recipe and make one loaf. Also, in the video it shows to add ice to the oven, but I don’t see it mentioned in the recipe. I know many sourdough recipes say to initially cover the loaves to keep in steam or to bake with boiling water in a pan in the oven, so I assume adding the ice does the same thing and is probably important. How much ice do suggest?
Yes, you can definitely cut the recipe in half. I would use a kitchen scale to ensure you have the right measurements. As for the ice, I must have forgotten to add that it to the instructions. Thanks for catching that!
I wanted to create a recipe that didn’t require a Dutch oven because a lot of people don’t have them since they are quite expensive, that’s why I add the ice to create steam in the oven. If you use a Dutch oven the temperature is usually set at 500 degrees for the first 15-20 minutes, then the temp is lowered.
If you use a cast iron skillet with no cover, just use about 1 cup of ice and throw it on a hot sheet pan inside the oven. Since the ice is frozen it will create steam as soon as it hits the hot sheet pan.
I’ve been using your recipe for several months now and love it I use either 75% EinKorn flour and 25% white OR 75% stoneground spelt and 25% white. I love the results. Recently I’ve been adding about 10% more water and the results have still been great.
Thank you for this recipe and for helping me figure out sourdough! I now make it weekly and love the process and the results.
One thing you may want to mention in your recipe is that the ice added to a dish for steam may still have liquid in it at the end of the bake time. This liquid is a very hot steam that can feel quite scalding in your face when you open the oven at the end of the bake.
Oh wow thank you so much for the feedback! And yes, you are right about the steam, it can be extra hot, especially with high temps on in your oven.
Thank you for sharing this recipe and for the pictures and video. I’m about to shape, rest, shape, and bake my loaves. I do have Dutch ovens, and I would like some specifics on using one for my round loaf. You did mention it starts out in a 500 degree oven for the first 15 to 20 minutes and then the temp is lowered. What temp should I lower it to, and how much longer should it bake approximately? Does the lid stay on the entire time?
Looking forward to trying this recipe! I’m new to sourdough, but am enjoying the learning process. Can you tell me, please, what size loaf pan do you use for this?