I have stumbled upon a chicken secret that I have found to be quite magnificent. Did you know that cooking a roast chicken upside-down creates the most succulent breast meat ever? Better yet, this recipe cooks a whole chicken in a fraction of the time too!
The chef at Chez L’Ami Louis, which is known for having the best roasted chicken in all of Paris shared his secrets in the kitchen on an episode of I’ll have what Phil’s having” on PBS. Roasted chicken is a sacred national dish in France, so you know their chicken has to be incredible!
The secret to the most succulent chicken
The chef at Chez L’Ami Louis in Paris shared his techniques
- First, he started out with a really hot oven.
- Then he seasoned the chicken.
- Next he put the chicken in a cast iron pan, which is oven-safe and can handle high heat.
- Then he basted the chicken with duck fat and goose fat (don’t worry, you don’t have to use that).
- Lastly, he baked the chicken breast-side-down the entire time on a higher temperature which caused the chicken to bake much faster.
Here’s why the recipe works
- Cooking the chicken upside down protects the breast from drying out because the fattier dark meat is basting the breast the entire time and it’s not exposed to direct oven heat. The result is the most succulent breast meat ever.
- Believe it or not, it’s actually quite difficult to dry out dark meat, so it can be cooked at higher temperatures and still be moist and tender.
- Although the skin of the breast meat doesn’t brown as much, the skin on the back gets nice and crispy, so you can still enjoy lots of crispy skin.
- We are roasting it at a higher temperature which cooks the chicken much faster
Recipe Ingredients
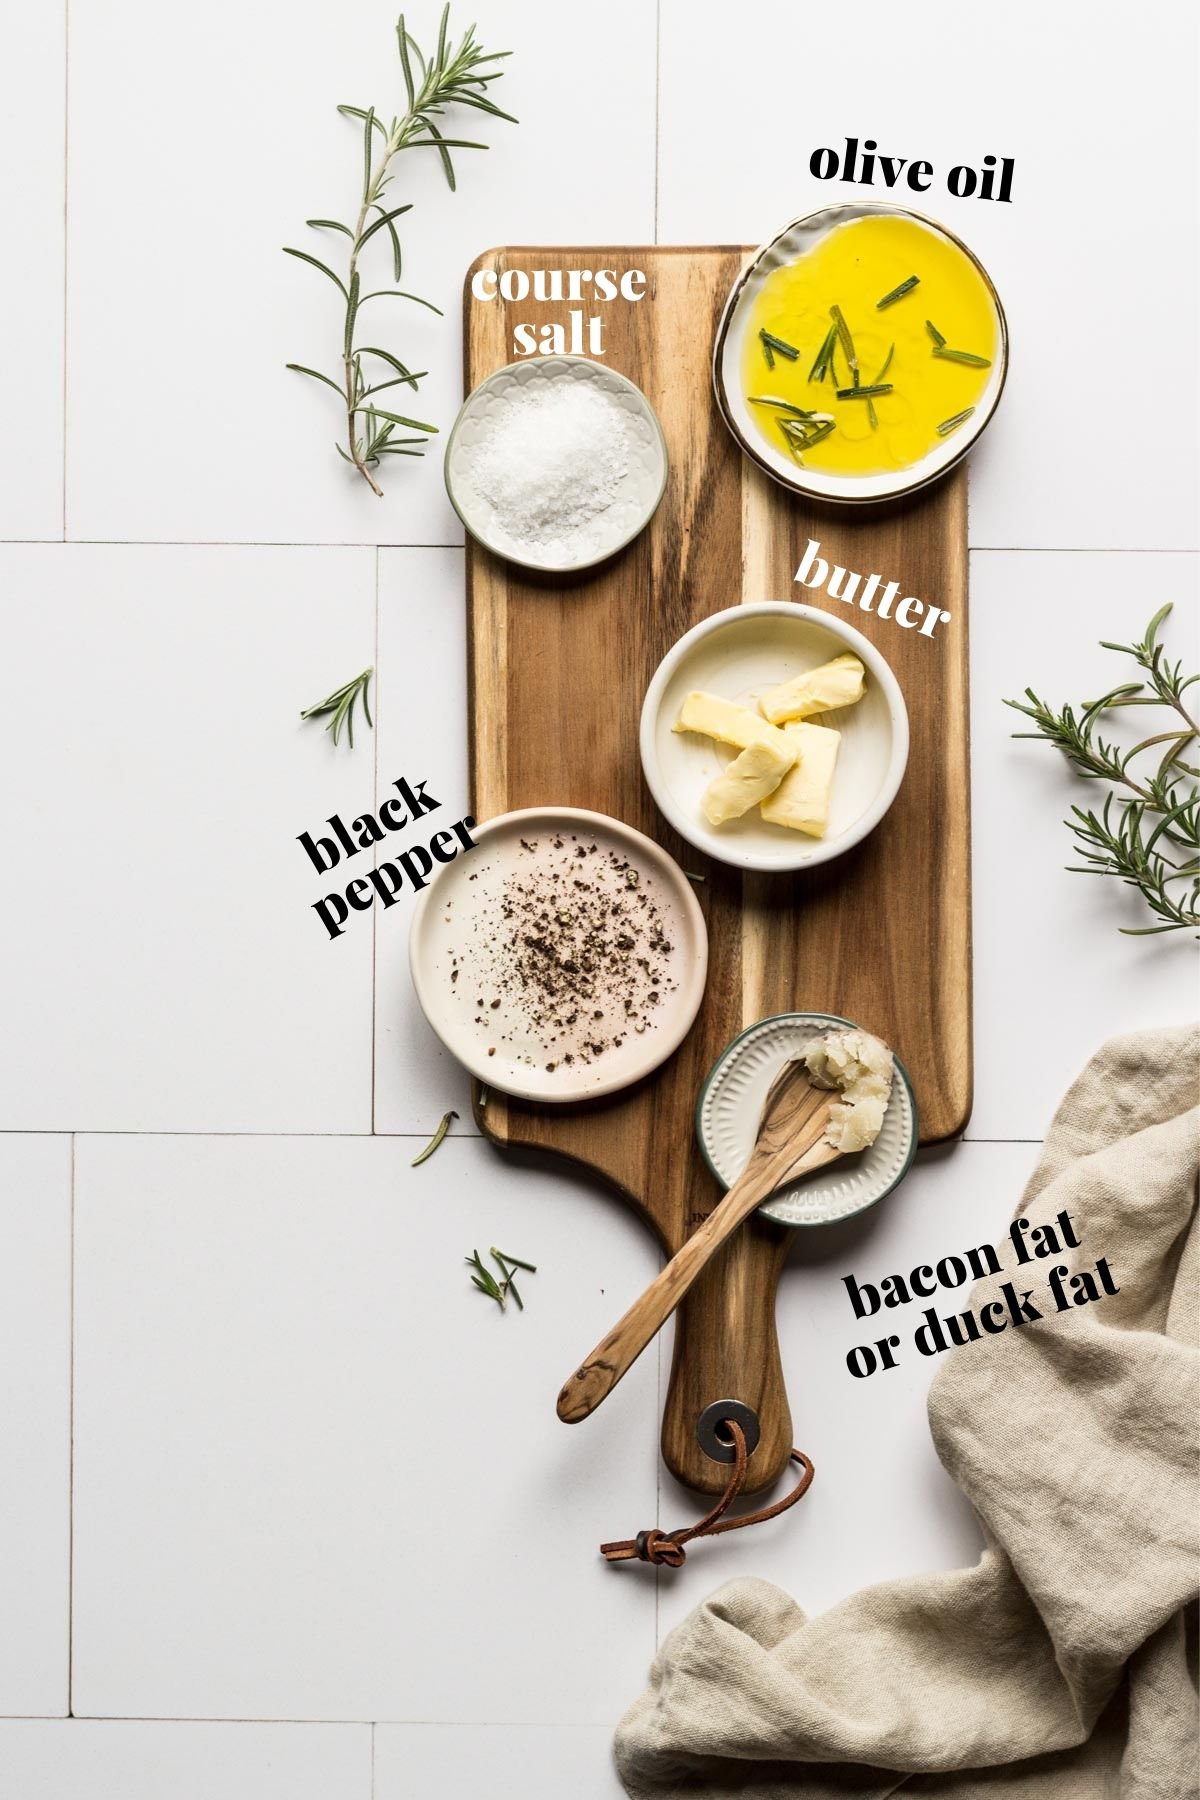
- Duck fat is my favorite fat to use (and I don’t even like the flavor of duck meat). Duck fat tastes amazing with roasted chicken and vegetables, and makes the most unbelievable roasted potatoes you’ve ever had too!
- Other types of fat–Chicken fat, bacon fat, butter, or olive oil would also be a great substitute because the cooking technique itself is what really matters (see photo above).
- A whole chicken (make sure to remove any organs in the cavity).
- Carrots and onions under the roast chicken help the flavor of the chicken, plus they get basted in the chicken juices which makes them taste amazing.
- Fresh rosemary or thyme for more flavor (you can omit if you don’t have herbs).
Easy step-by-step instructions
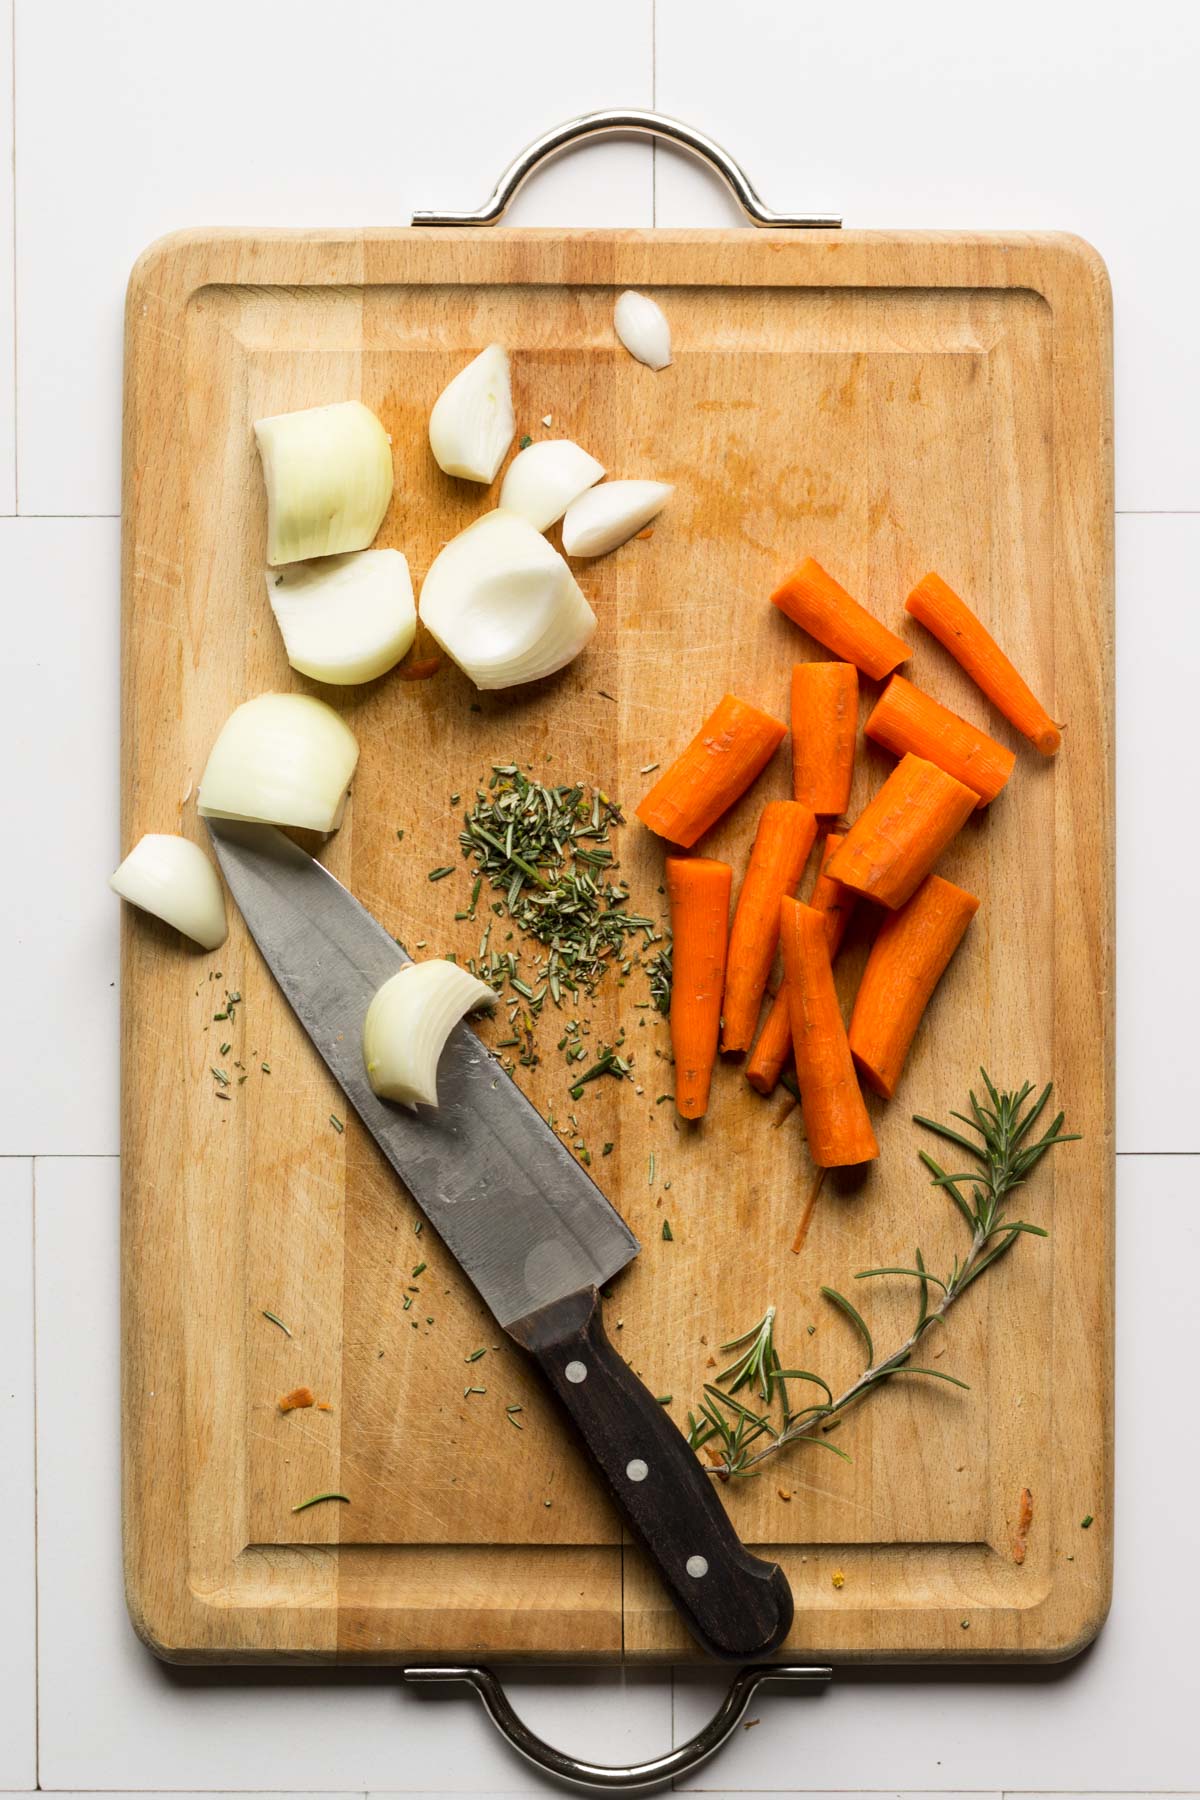
- Chop whole carrots into 2 to 3-inch pieces. We want to keep the carrots bigger so they don’t soften too quickly.
- Cut a large onion in half and cut each half into quarters.
- Finely chop fresh rosemary. Reserve 1-2 whole sprigs for the pan. You can also substitute fresh thyme for rosemary if you’d like.
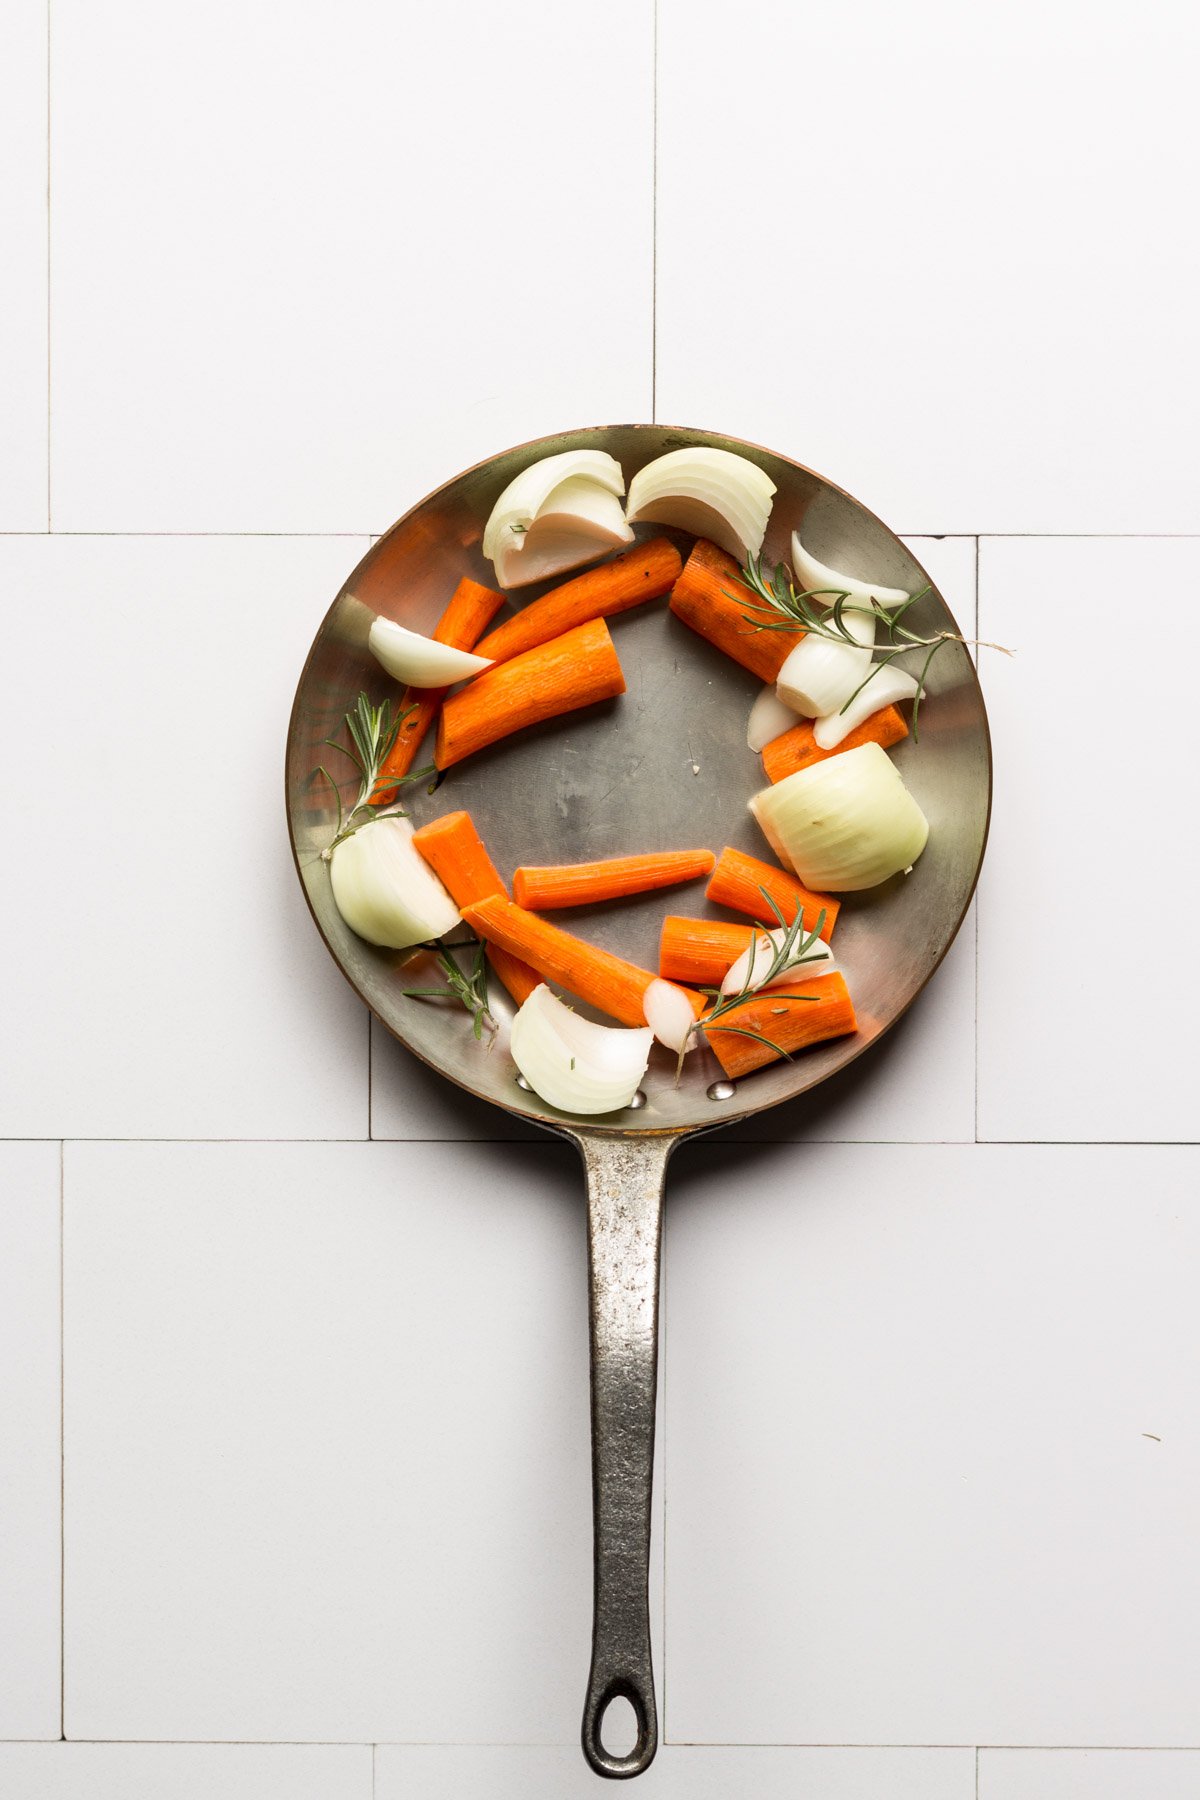
- Lay the onions, carrots, and 2-3 sprigs of rosemary in a circle in the pan. Make sure you are using an oven-safe large saute pan, cast iron skillet, ceramic pan, or roasting pan that can handle high heat. The vegetables will prop up the chicken during cooking and will be basted and flavored by the chicken…yum!
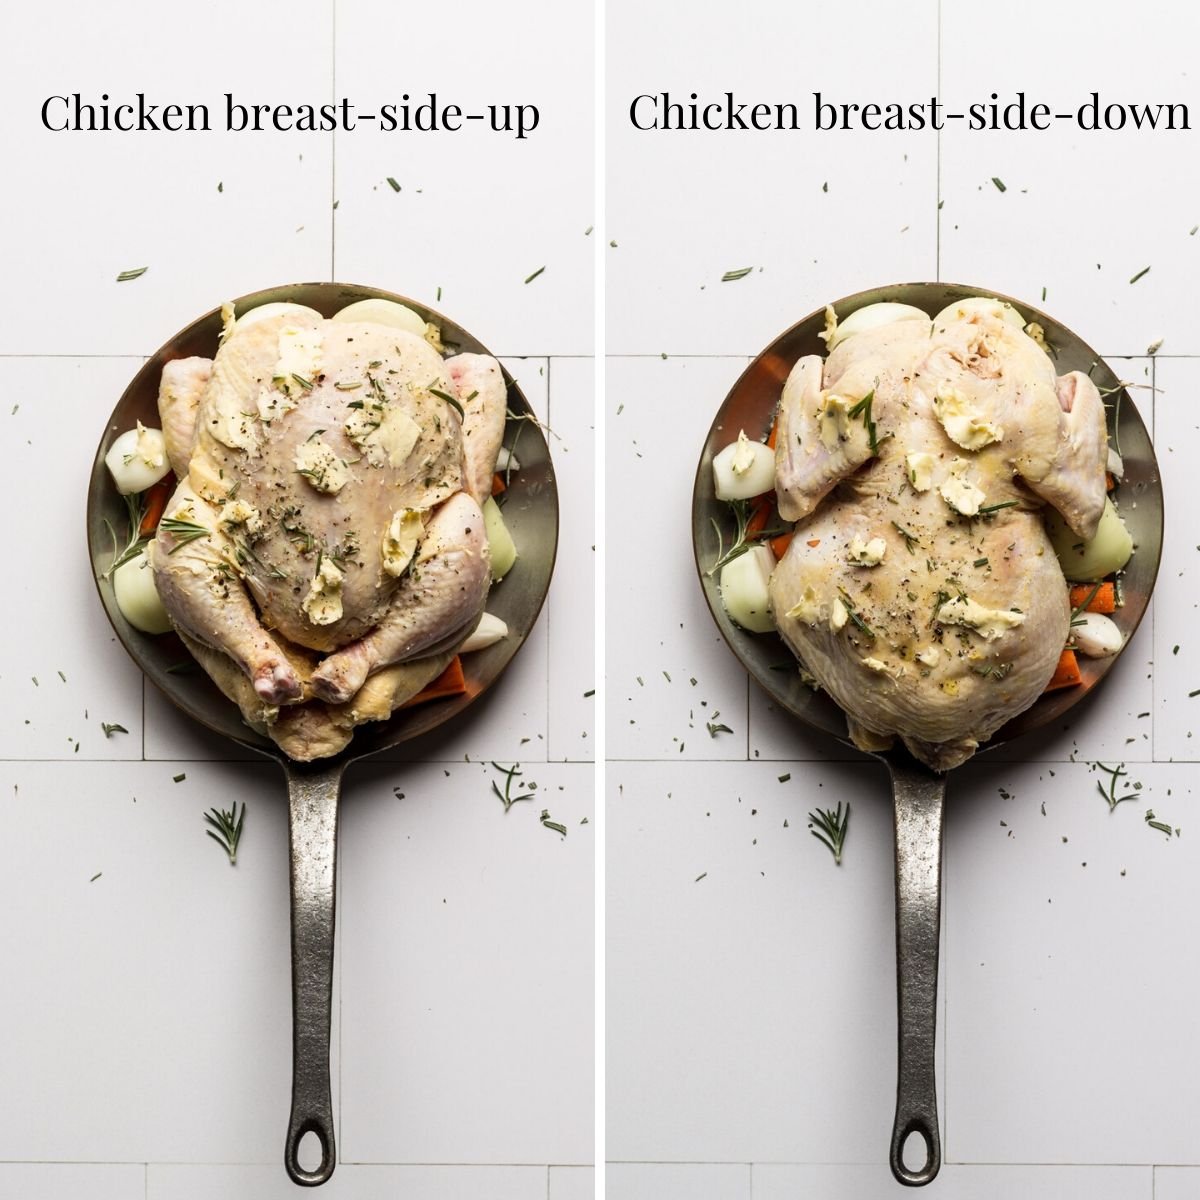
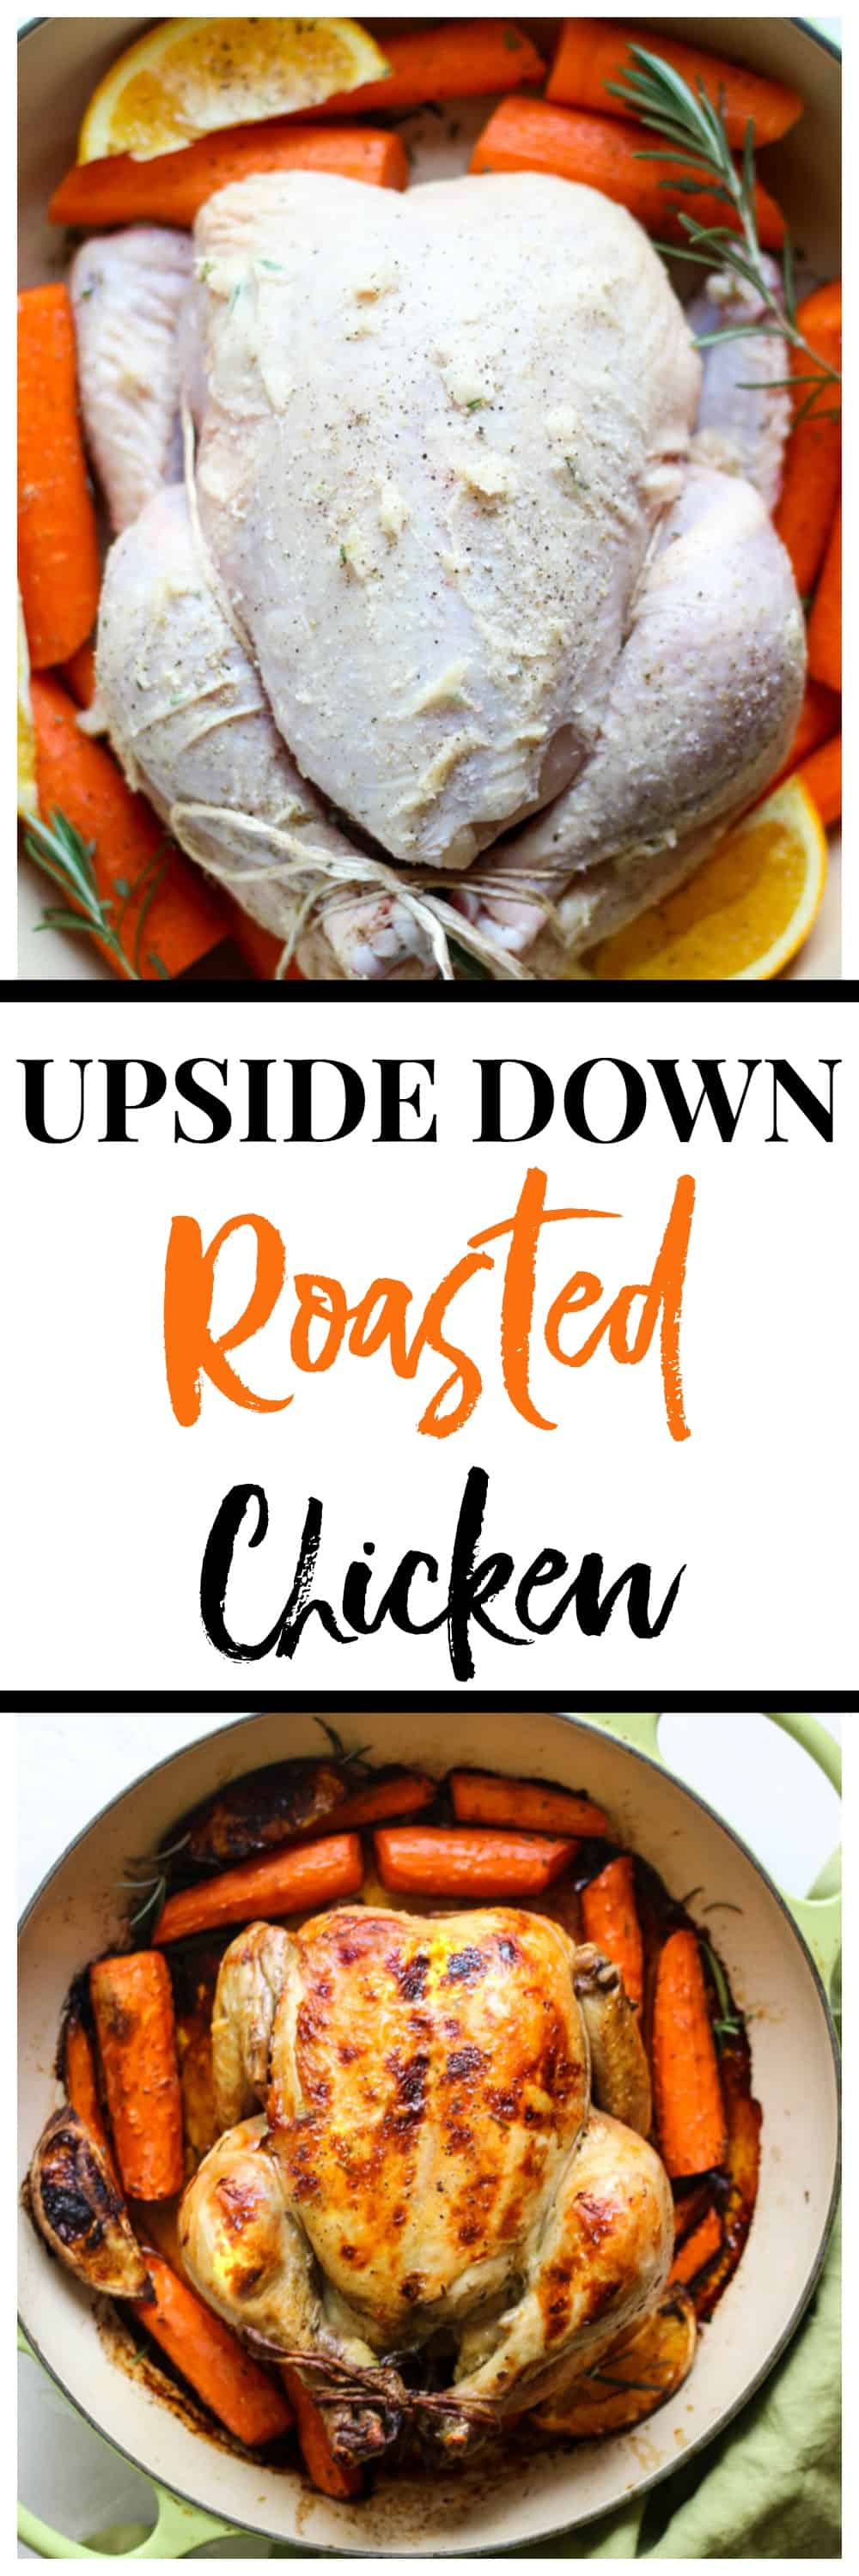
Step 5) Below is what the chicken looks like breast-side-up and breast-side-down after it’s been seasoned with salt and pepper and rubbed with butter and bacon fat. Rub the chicken with whatever type of fat you prefer.
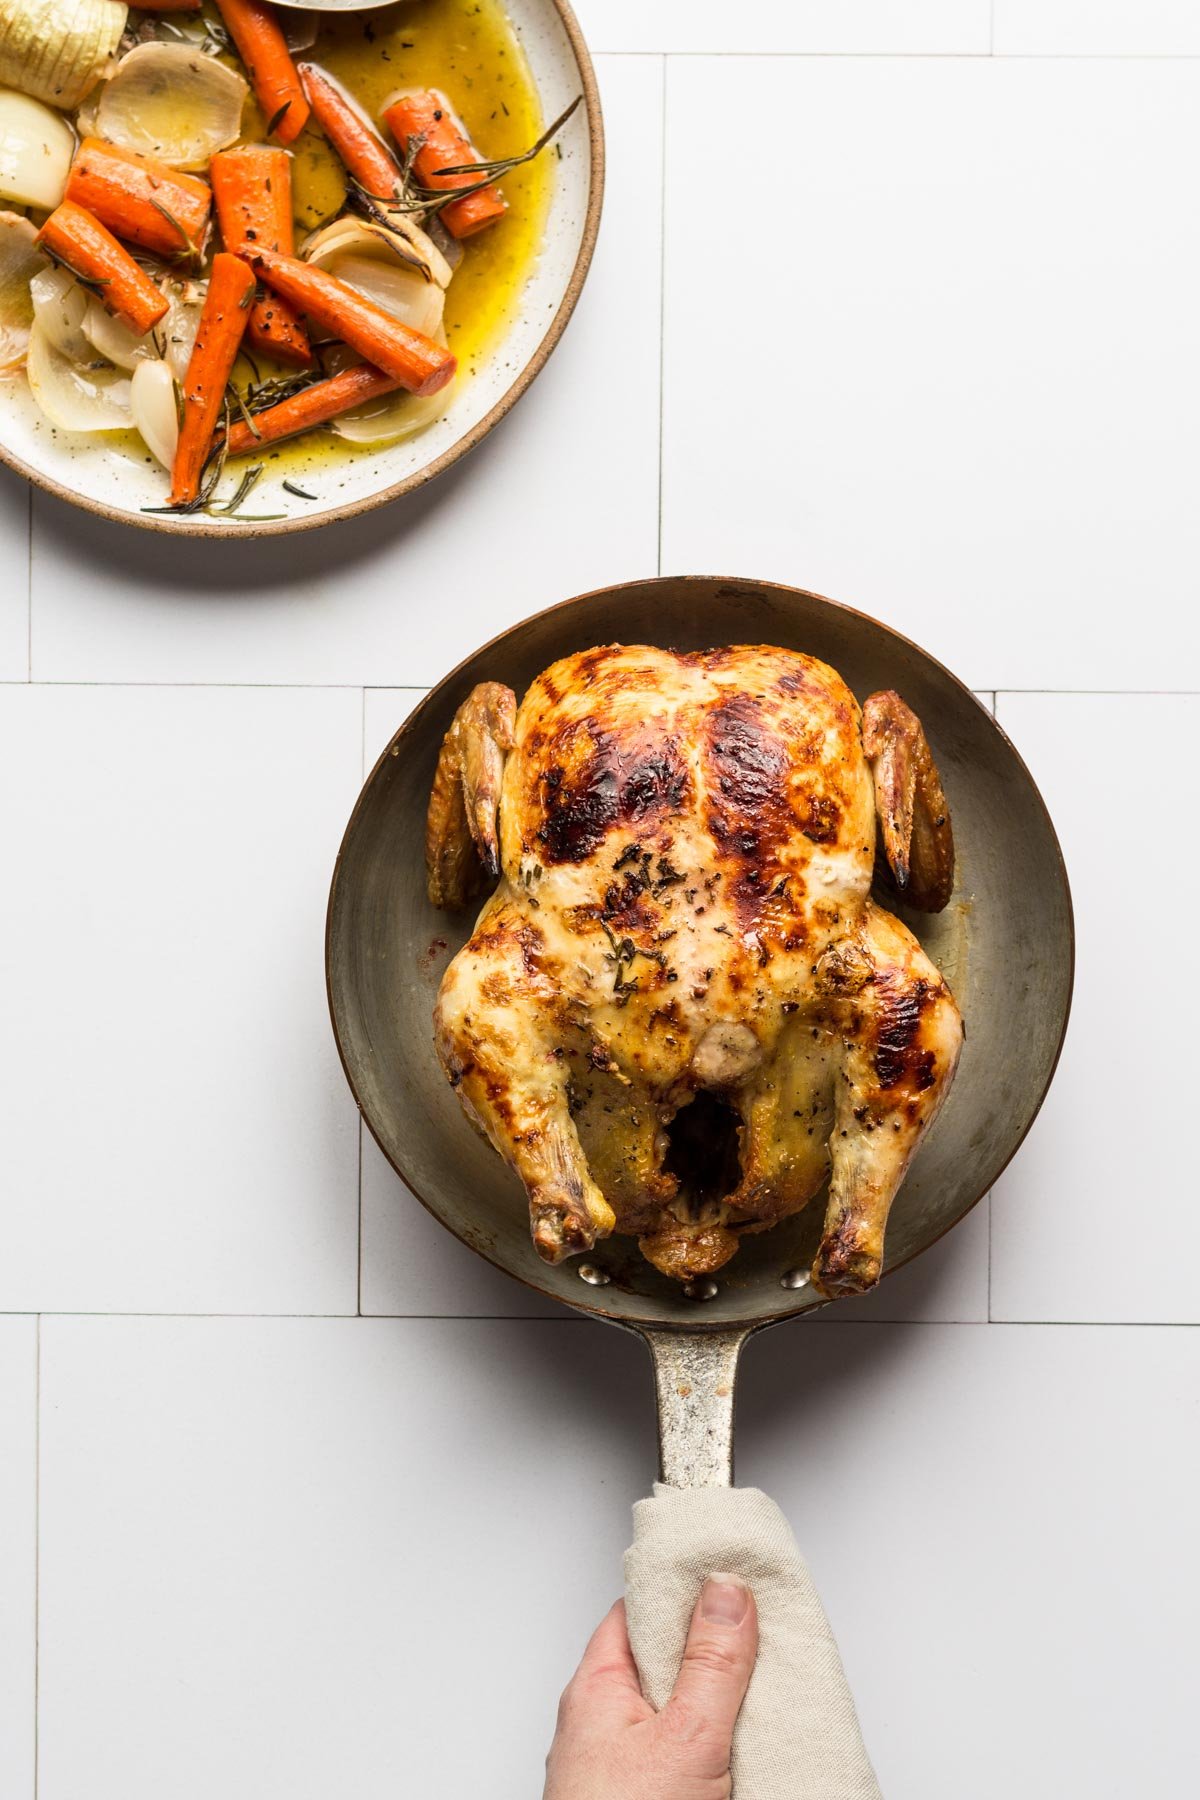
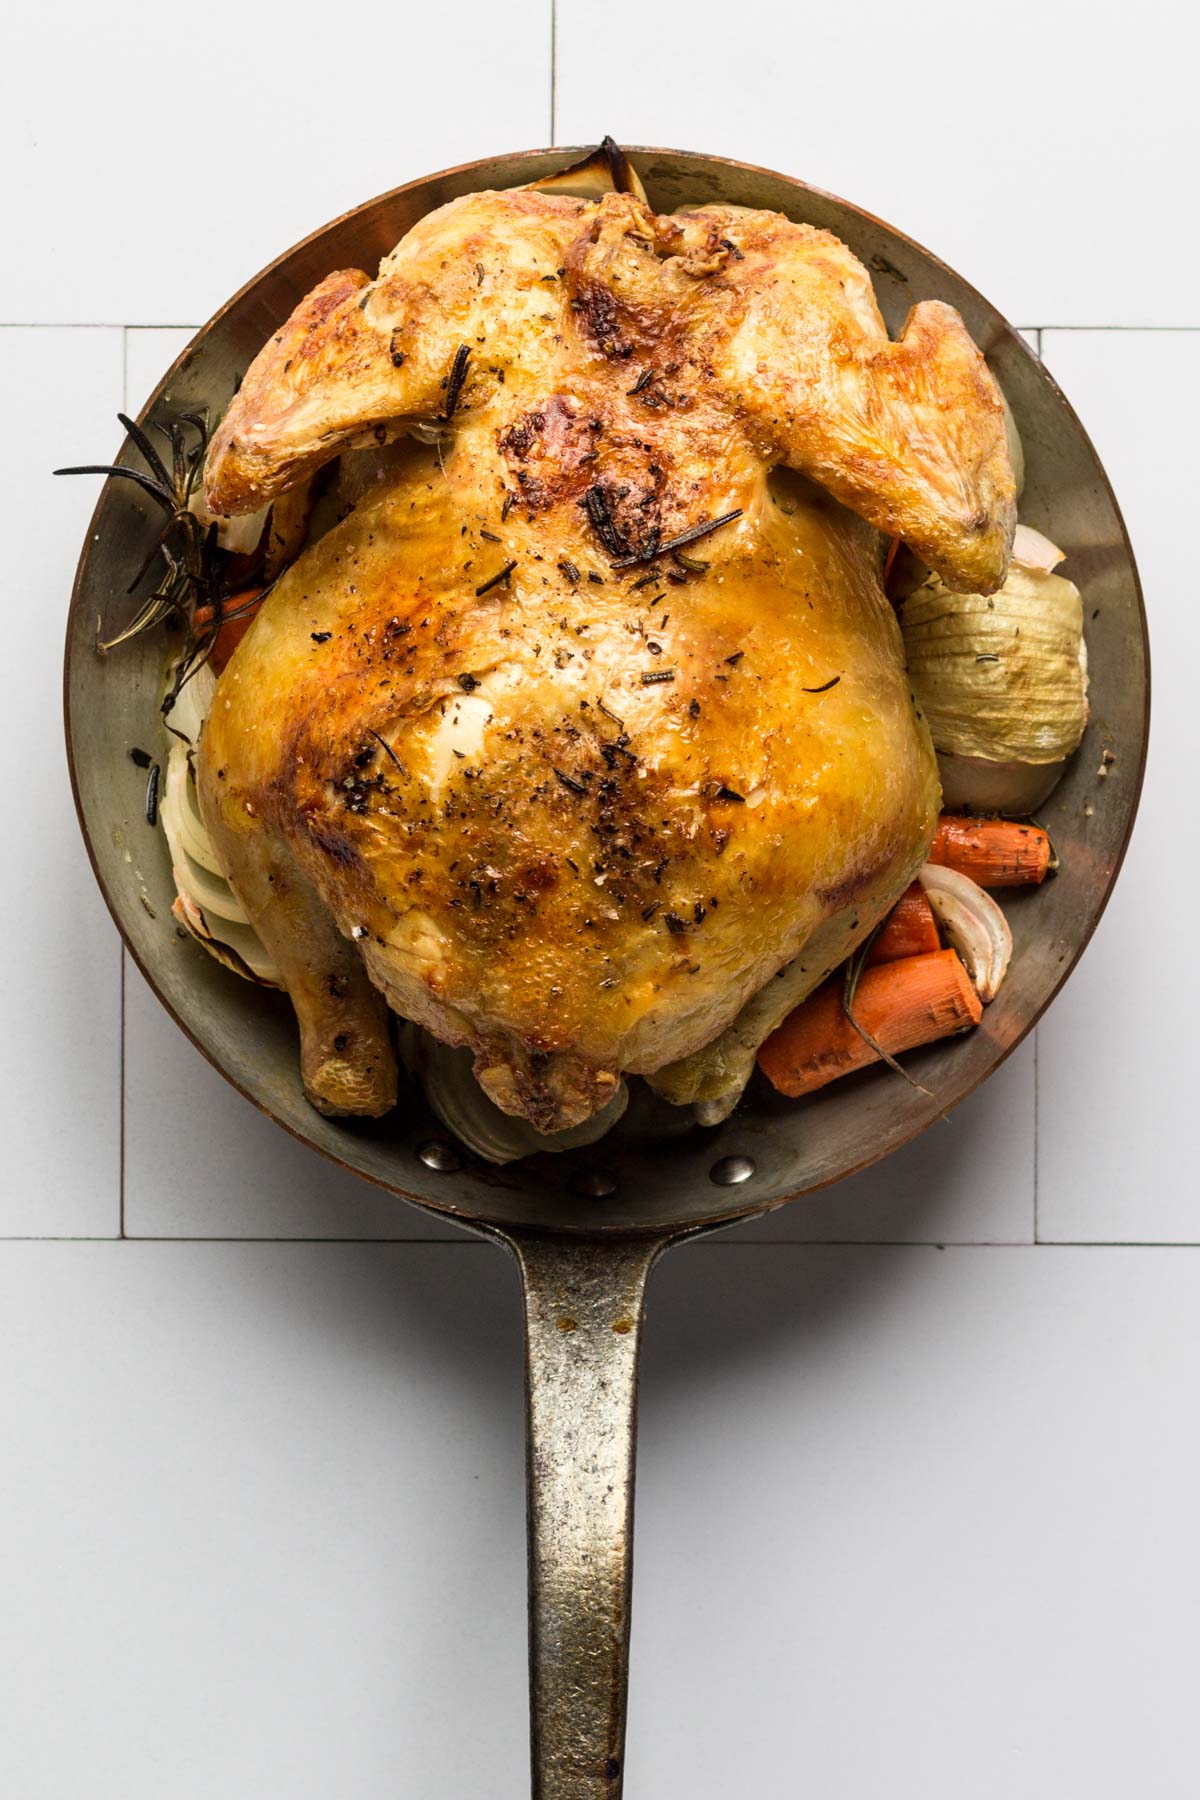
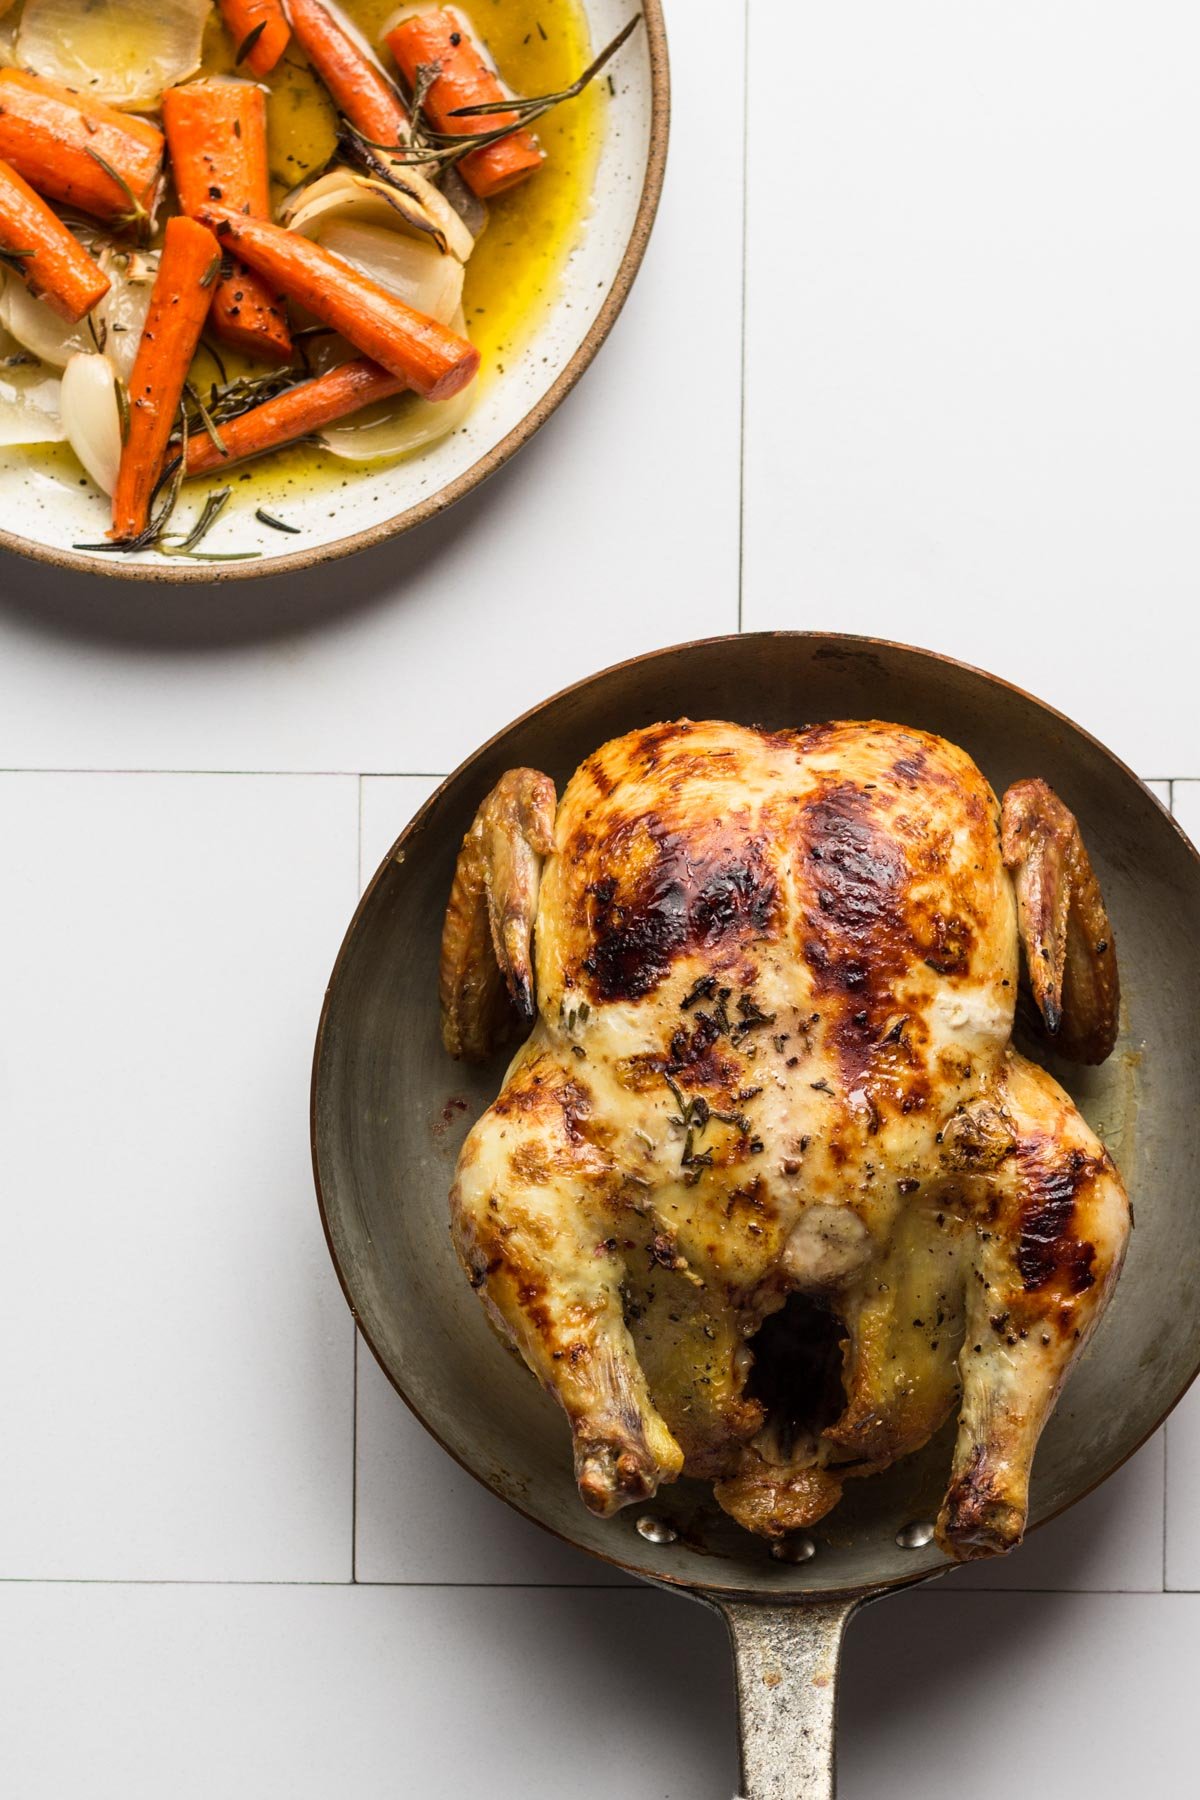
Next is a photo of what it looks like out of the oven, breast-side-down again. You can see that you get plenty of crispy skin on the bottom!
Step 6)
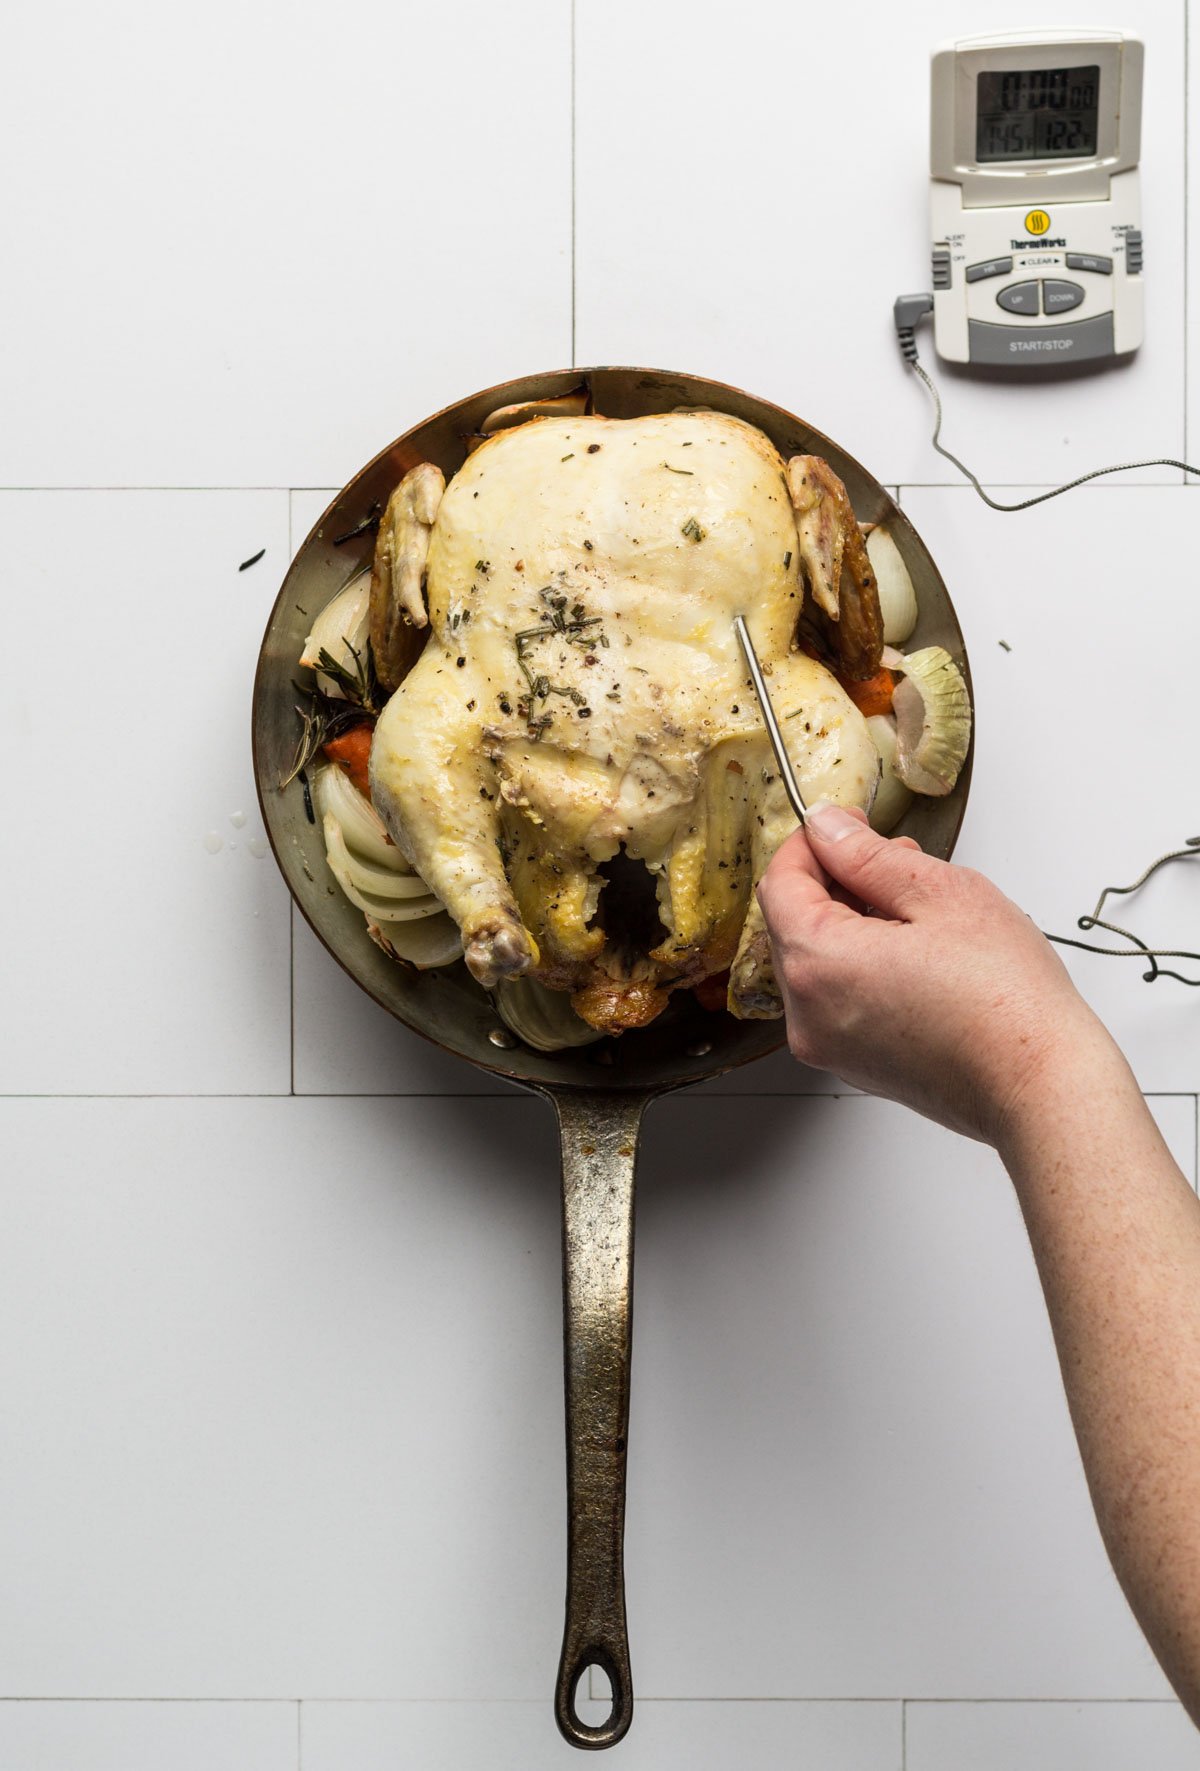
Take the chicken out of the oven when a thermometer inserted in the chicken breast reads 160-165 degrees Fahrenheit because as the meat rests, the temperature raises which will help finish cooking the breast meat through.
You’ll need to remove the pan from the oven and flip the chicken over breast-side-up in order to get an accurate temperature.
Finishing the roast chicken, two options:
Option 1:
If you don’t mind your breast meat being white/blonde, you can bake the chicken upside down the entire time until it reaches 160-165 degrees Fahrenheit. You’ll be able to get lots of crispy skin from the back of the chicken.
Option 2:
If you prefer to have a little color on the breast meat, you’ll need to flip the chicken breast-side-up and finish baking for about 10 minutes under the broiler (with the broiler turned on) until the breast meat reaches 160-165 degrees Fahrenheit. Please see the recipe card for these two options.
When the breast meat reaches 160-165 degrees, remove it from the oven. Let it rest for 10-15 minutes before carving to allow the meat to finish cooking and for the juices to redistribute inside the chicken.
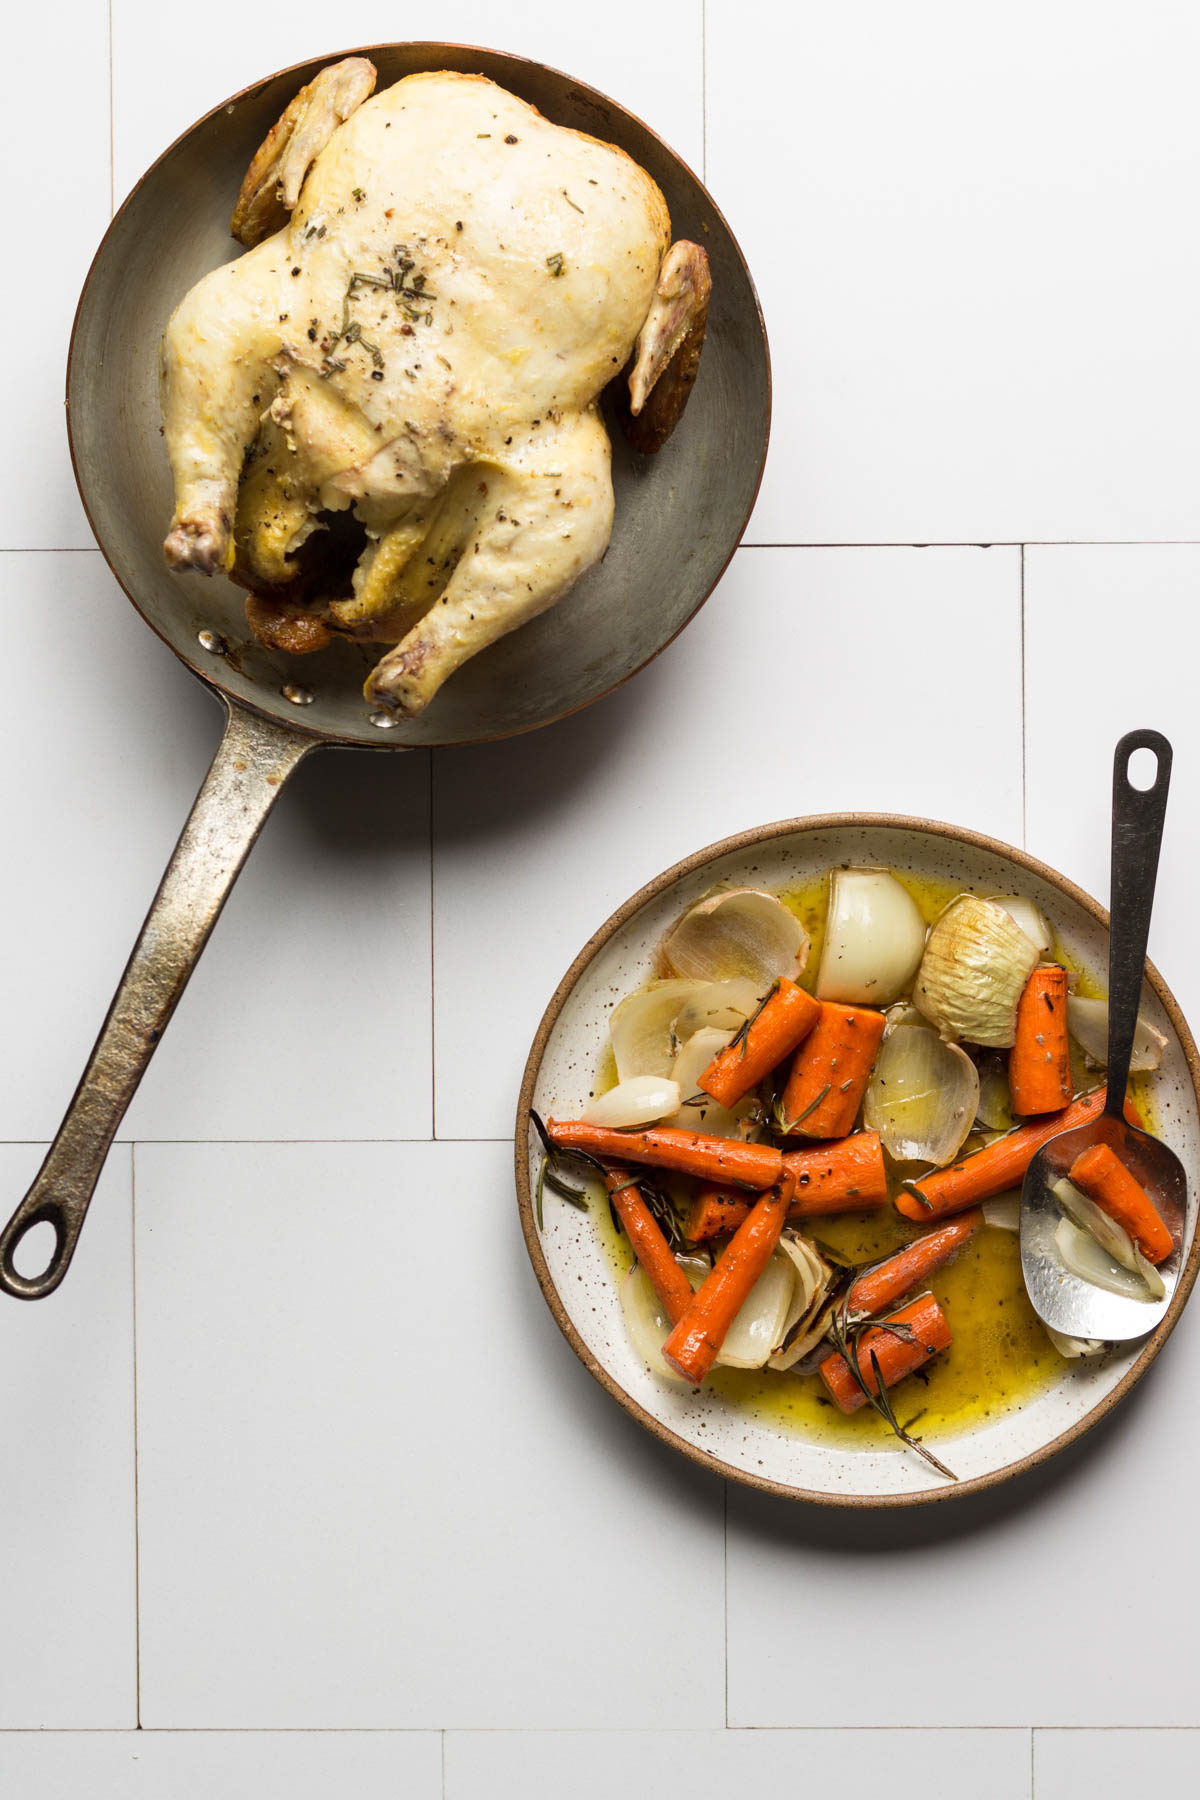
If you broil the chicken breast-side-up at the end, it will look like the photo below.
How to carve a roast chicken
Before you carve that meat, let it rest for 10-15 minutes! I can’t stress this point enough. Once it’s rested, place the chicken on a large cutting board breast-side-up.
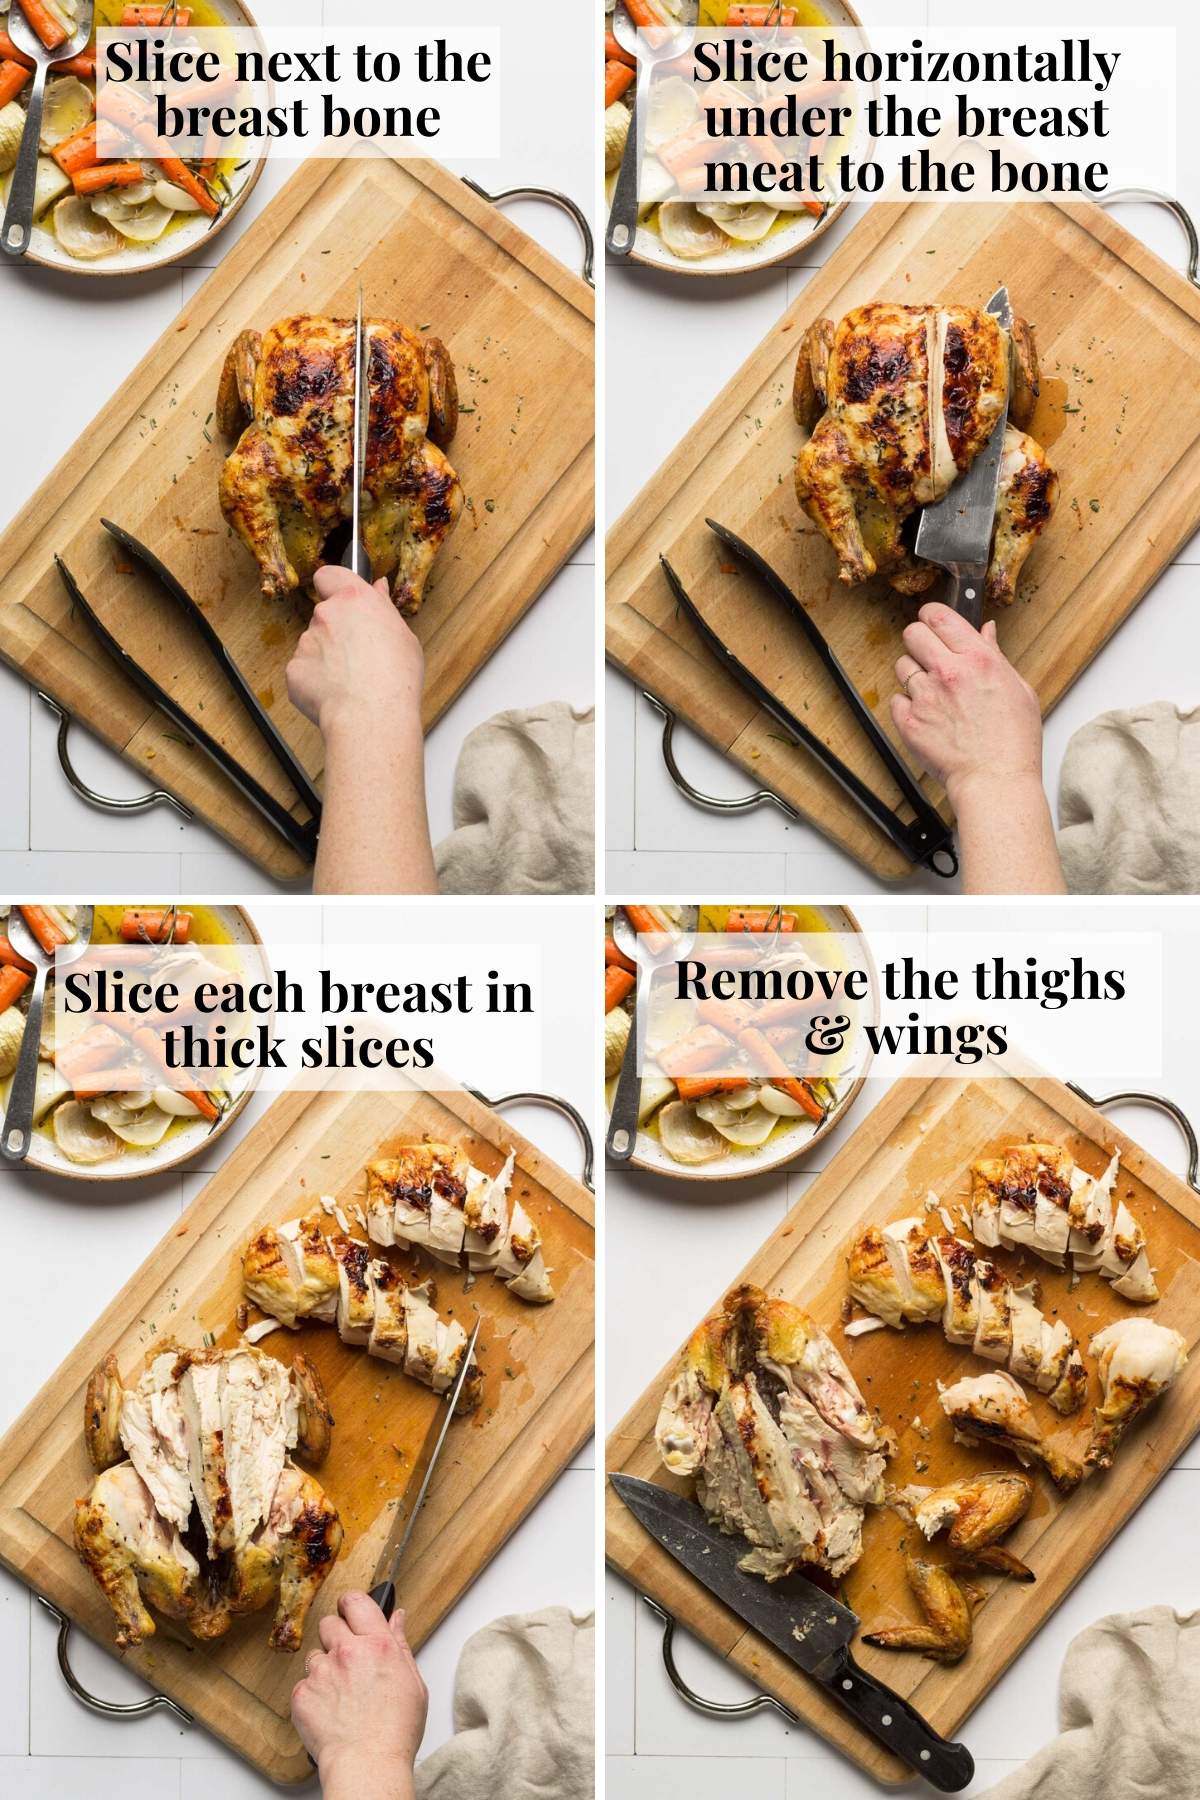
- Remove the crispy skin on the back of the chicken and hide all of it for yourself while carving, ha!
- Slice straight down right next to the breast bone.
- Take the knife at the bottom of the breast meat and slice inward horizontally towards the bone.
- Remove the breast from the bone and repeat on the other side.
- Slice the two breast cuts into thick slices
- Remove the thighs and wings
Serving the dish
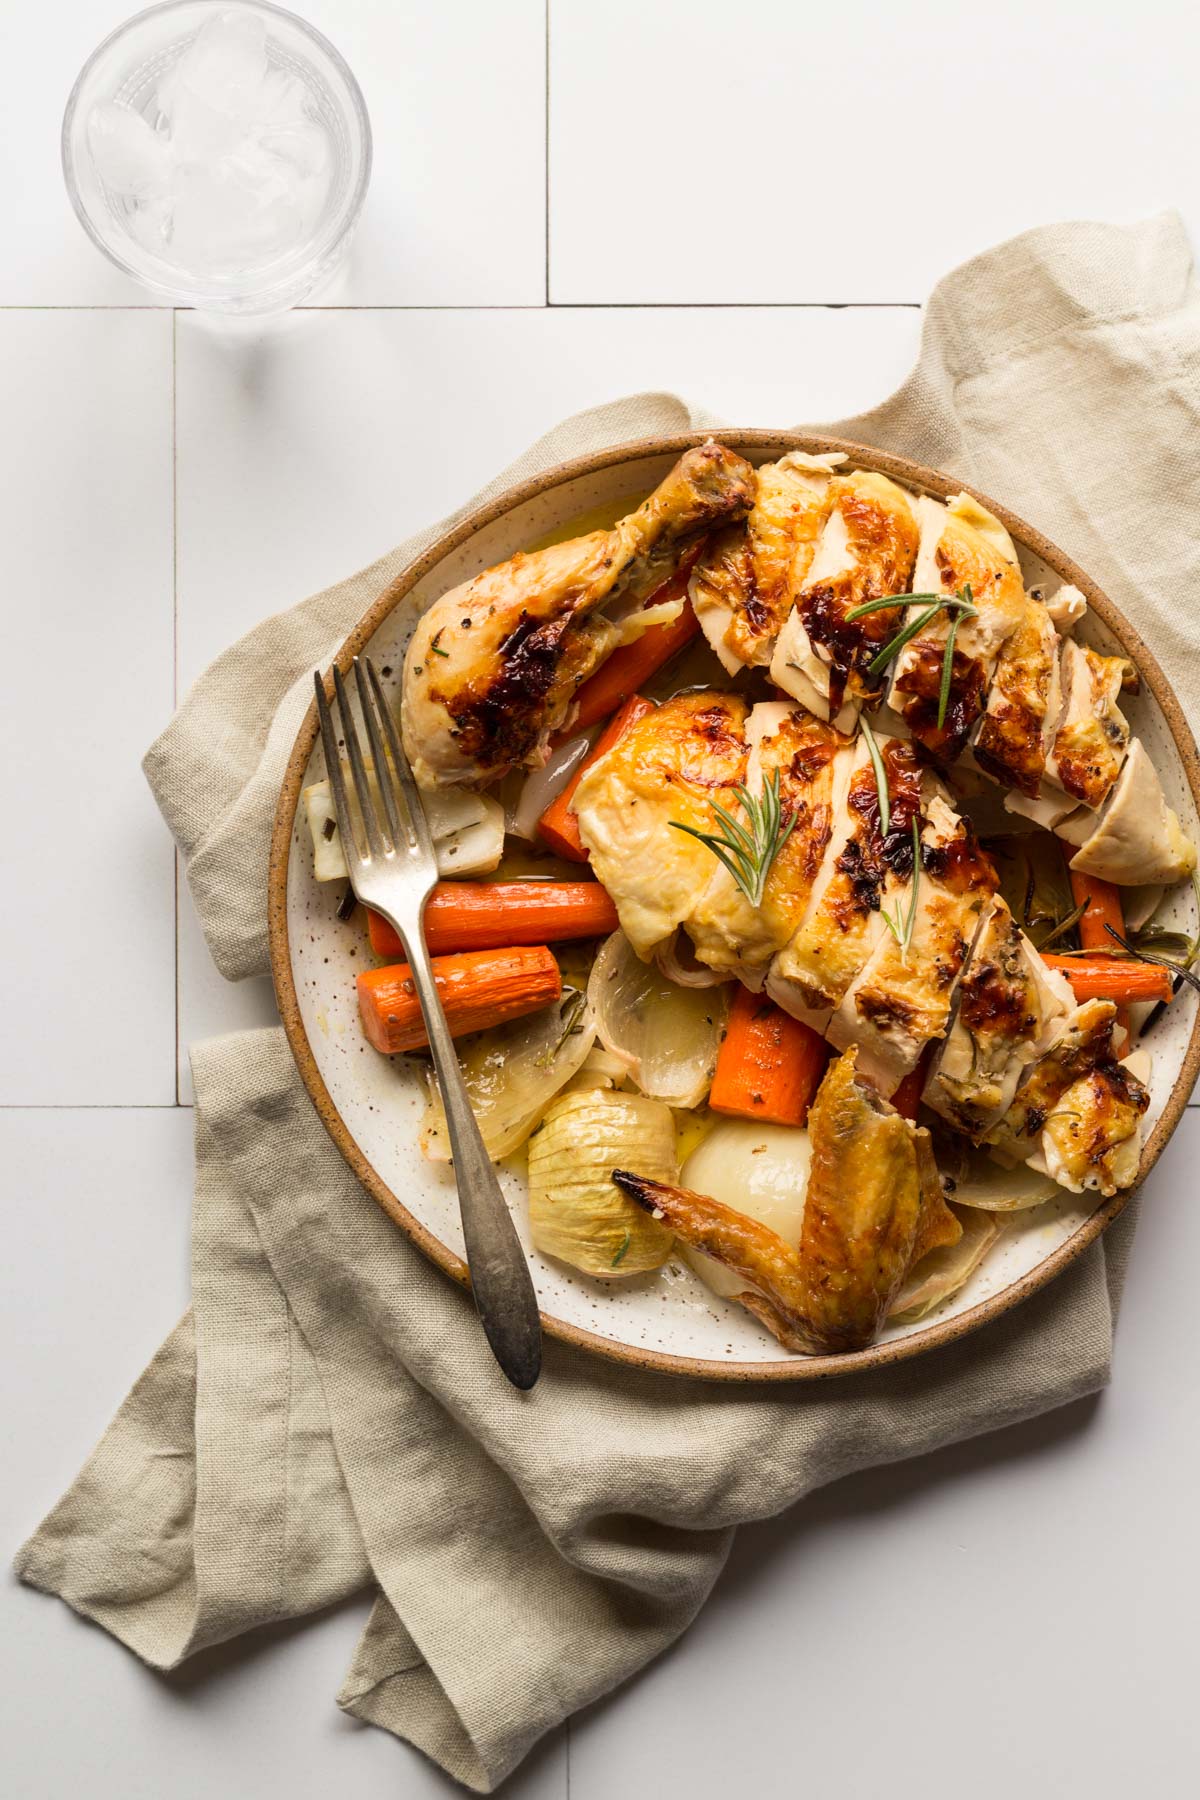
Spoon some of the pan drippings over the chicken and vegetables for extra succulent flavor.
The roasted vegetables have basted under the chicken while cooking and are so incredibly good!
Helpful recipe tips:
- You’ll need to allow for your chicken to rest for 10-15 minutes to allow for the juices in the chicken to reabsorb inside the meat so that the meat remains moist. The resting time rule applies to all types of meat.
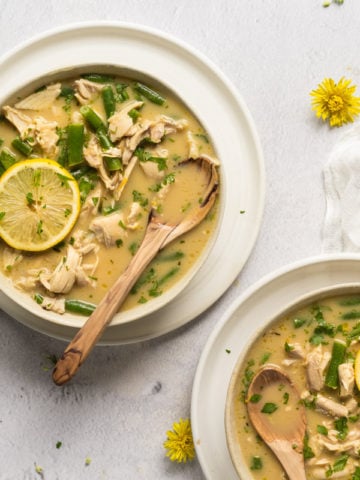
- You’d be surprised at how much meat you can get off of the bone. You’ll want to use your hands to remove the meat. If you have enough leftover meat you can use it to in this easy soup recipe.
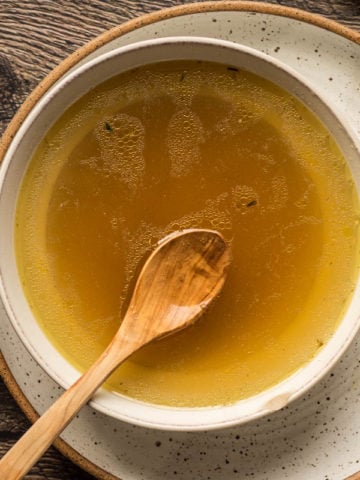
- Don’t throw away the chicken bones! You can freeze the bones in a container for up to one month and make delicious homemade chicken broth or rich chicken bone broth.
- If you want to make homemade broth, save the carrot and onions skins because you can add those into your stock. You can freeze the vegetable scraps for one month to save for when you are ready to use them for soup or broth.
- Antique stores will often sell cast iron skillets and heavy-duty cooking vessels that were built to last generations.
How long do I cook the chicken?
This depends on how many pounds your chicken is. Because you are cooking this chicken at 450 degrees, it will bake much faster than other roast chicken recipes. Check the temperature of the breast meat when the skin on the back begins to caramelize. This is a good indicator that the chicken is almost done.
Related Recipes
Bake your roast turkey upside too!
Make Easy Lemon Chicken Soup with the leftover meat
Save the bones and make Instant Pot Chicken Bone Broth
or Homemade Chicken Stock (requires less bones)
Serve Poblano Cheddar Cornbread on the side
Bon Appetit Ya’ll,
Leslie O.
Upside Down Roasted Chicken Recipe
Equipment
- Le Creuset ceramic skillet
Ingredients
- 1 Whole Chicken (weight varies but I used a 6 pound chicken and it fit in my 9.5 inch wide cast iron skillet)
- 2 Tbsp Duck fat chicken fat, bacon fat, butter, or olive oil can be substituted
- salt and pepper
- half of one lemon
- 3-4 whole carrots skinned and cut into large pieces
- 1 onion quartered and skins removed
- A few sprigs fresh thyme or rosemary
Instructions
- Preheat the oven to 450 degrees and place a rack in the middle position.
- Rinse the chicken and check the cavity for the neck and gizzards. You may keep them in the cavity (be sure to remove any packaging) for added flavor to the bird or you can freeze them and use to make gravy.
- Dry the chicken with paper towels really well.
- Place a half of one lemon and a few thyme rosemary sprigs in the cavity and season the entire bird with salt and pepper and sprinkle with fresh thyme. Rub the bird with duck fat, chicken fat, bacon fat, olive oil, or butter.
- Add carrots, onions, and rosemary or thyme to the rim of the bottom of the pan. Place the bird upside down (breast-side-down) in the cast iron skillet or heavy duty oven-safe ceramic pan.
Finishing the roast chicken, two options:
- Because you are roasting the chicken at a higher temperature, it's going to bake faster than other roast chicken recipes. Check the temperature of the breast meat when the skin on the back of the chicken starts to caramelize. This is a good indicator the chicken is almost done.
- Option 1:If you don't mind your breast meat being white/blonde, you can bake the chicken upside down the entire time until it reaches 160-165 degrees Fahrenheit. You'll be able to get lots of crispy skin from the back of the chicken.If you prefer option one you don't need to remove the vegetables from the pan at the end of the cooking time in the oven.
- Option 2:If you prefer to have a little color on the breast meat, you'll need to flip the chicken breast-side-up and finish baking for about 7-10 minutes under the broiler (with the broiler turned on) until the breast meat reaches 160-165 degrees Fahrenheit. Remove the vegetables and the pan juices to a plate before finishing cooking the chicken. This will keep the skin crisp in the pan. You'll want to flip the chicken over once it reaches 145-150 degrees Fahrenheit to give the breast meat enough time to caramelize under the broiler. Do not walk away from the oven at this point! Stand by to make sure the skin doesn't burn.
- Remove the chicken from the skillet and let it rest for at least 10-15 minutes before carving.
Notes
- Because you are cooking this chicken at 450 degrees, it will bake much faster than other roast chicken recipes. Check the temperature of the breast meat when the skin on the back begins to caramelize. When the breast meat reaches 160-165 degrees, remove it from the oven.
- If you want to caramelize the skin on the breast meat, flip the chicken over and remove the vegetables and pan juices once it reaches 145-150 degrees Fahrenheit. Then follow instructions for finishing it breast-side-up.
Nutrition
If you want to receive updates on new recipes, please subscribe to my blog in the form below!

I’d love to put it towards new bedding and new dishes!
I would purchase some of the appliances that are expensive that I have on my wish list.
Wow, Leslie, this recipe sounds amazing. We love cooking with cast iron and your photos make me want to take a bite out of my screen, the chicken looks so delicious. Thank you for sharing. I will definitely be making this roasted chicken!
Thanks Robin. It’s a winner winner chicken dinner recipe! Let me know how it turns out if you make it:)
I think I found my next chicken recipe. Looks great, Leslie. So excited about the giveaway!
That golden brown, crispy skin looks TOO tasty! I wish I could have a bite now.
Thanks Lindsey, I wish I could too, LOL!
I have made this chicken in the past and was planning on it for dinner tonight, but the actual recipe has vanished. Help!
OMG Denise, thank you for catching this!! I must have accidentally deleted the recipe when I was migrating all my recipes to a new template a while back…EEK! I’m so glad to hear you are making this again. I added the recipe again (luckily I had the old ones saved). I would HIGHLY recommend adding some whole carrots to the perimeter of the cast iron skillet if there is room. The juices from the chicken make the carrots taste better than any roasted carrot you’ve ever tried. What kind of fat are you using? Duck fat is my favorite, but any of the subs are delicious too. You are amazing, thank you for letting me know about the missing recipe!!!
This is great! I saw the episode of Phil and was searching for similar recipes when I found yours!! My boyfriend and I were SO excited!
One question we had was, if you don’t have a cooking thermometer, approximately how long would it take a 6lb chicken to reach 160 degrees?
—And is there an easy conversion for figuring out how long to bake, say a 3 lb chicken?
Thank you!
Hi Cristen, this is actually a great question and one I don’t quite have the answer to. When you scour through Google for a conversion chart for cooking chicken at 450 degrees, all you get are results that say not to cook chicken at 450 degrees for more than 10-15, then you drop the oven temp to 350-375 degrees for the rest of the time.
That’s because most haven’t discovered this amazingly simple secret that you and I have discovered via Phil in Paris! I would highly recommend going to the store and buying a thermometer. There are really inexpensive ones at your regular grocery store (usually in the aisle where they sell cooking utensils) that aren’t digital and do the job perfectly. This is the only way to totally ensure you don’t overcook your chicken. It’s really useful anytime you want to cook any kind of meat in the oven or on the grill, and it comes in really handy for roasting a turkey too!
I actually updated the timing of when to turn over the chicken. Instead of turning it over when the breast reaches 160 degrees, I recommend turning it over when it reaches 150 degrees since it’s going to broil for 3-5 minutes (on the middle rack), then the temp will continue to rise as it rests. Because it cooks much faster at 450 degrees, it usually only takes about 40-45 minutes to cook a 3-5 pound chicken, but I can’t be for certain because I’m always cooking different size chickens which result in different times. For a 5-6 pound chicken, check it after 35 minutes or so, then continue upside down to cook as needed.
And always, always, always let your meat rest for at least 10 minutes before cutting into it. You probably know this, but I think it’s one of the most important rules to follow to keep any kind of meat moist.
I realize these instructions are a bit vague, so you have encouraged me to roast all sizes of chickens and really get a precise answer to your question. This roast chicken is my favorite all-time meal, so I’m not sad about it! Please check back in and let me know how it turns out. Your experience will help to improve the recipe.
Take care
Do you suggest a cast iron skillet or a Dutch oven? I have both.
Since they both retain heat really well and are oven-safe, I’d use the one that’s the larger size so you can have more room to add carrots and onions underneath. The juices from the chicken will make the most delicious roasted carrots and onions!
I made this chicken last night (I substituted a shallot in the cavity of the bird) and it was fantastic! WE DO NOT like white meat chicken and I am on a diet that calls for baked chicken breast so I was looking for recipe to help keep it juicy so I could eat the white meat first. This turned out so well, my husband says it is his new favorite, we just skimmed the skin off after it was done resting and it was so moist and flavorful! And a 6 pound bird left tons of leftover dark meat for my husband to have for lunch! I have a square cast iron skillet that was the perfect size and my carrots and onions were perfectly roasted, this recipe is a keeper!
I’m so glad to hear you and your husband loved the recipe!! Thank you for your feedback, it means a lot.
Won’t roast a chicken any other way again. This came out perfect 👌!
OH I’m so happy to hear that the recipe worked for you! Thank you for commenting, I appreciate it.
Will never roast a chicken any other way than this moving forward. Absolutely the best roast chicken ever! Thank you for sharing this recipe.
You have single handedly helped me perfect my roasted chicken. I use this recipe EVERY TIME. It is delicious.
Looked forward to using more of you recipes.
I’m SO SO happy this recipe and technique have worked for you!!
I made two chickens following the recipe exactly and they were both so juicy and delicious! I will say that I cooked one in a cast iron skillet and the other in a Dutch oven, uncovered. Both chickens were fantastic but the vegetables came out better in the Dutch oven because they did not char as much as the ones in the skillet. Now for an upside down turkey…. 🙂
I’m so glad the recipe worked for you! Thank you so much for sharing your experience!